# Panel Cleaner
[](https://www.gnu.org/licenses/gpl-3.0)
[](https://github.com/voxelcubes/PanelCleaner/releases)
[](https://pypi.org/project/pcleaner/)
[](https://github.com/psf/black)
[](https://crowdin.com/project/panel-cleaner)
This tool uses machine learning to find text and then generates masks to cover it up with the highest accuracy possible. It is designed to clean easy bubbles, no in-painting or out-of-bubble text removal is done. This is intended to save a lot of monotonous work for people who have to clean a lot of panels, while making sure it doesn't paint over anything that it wasn't supposed to.
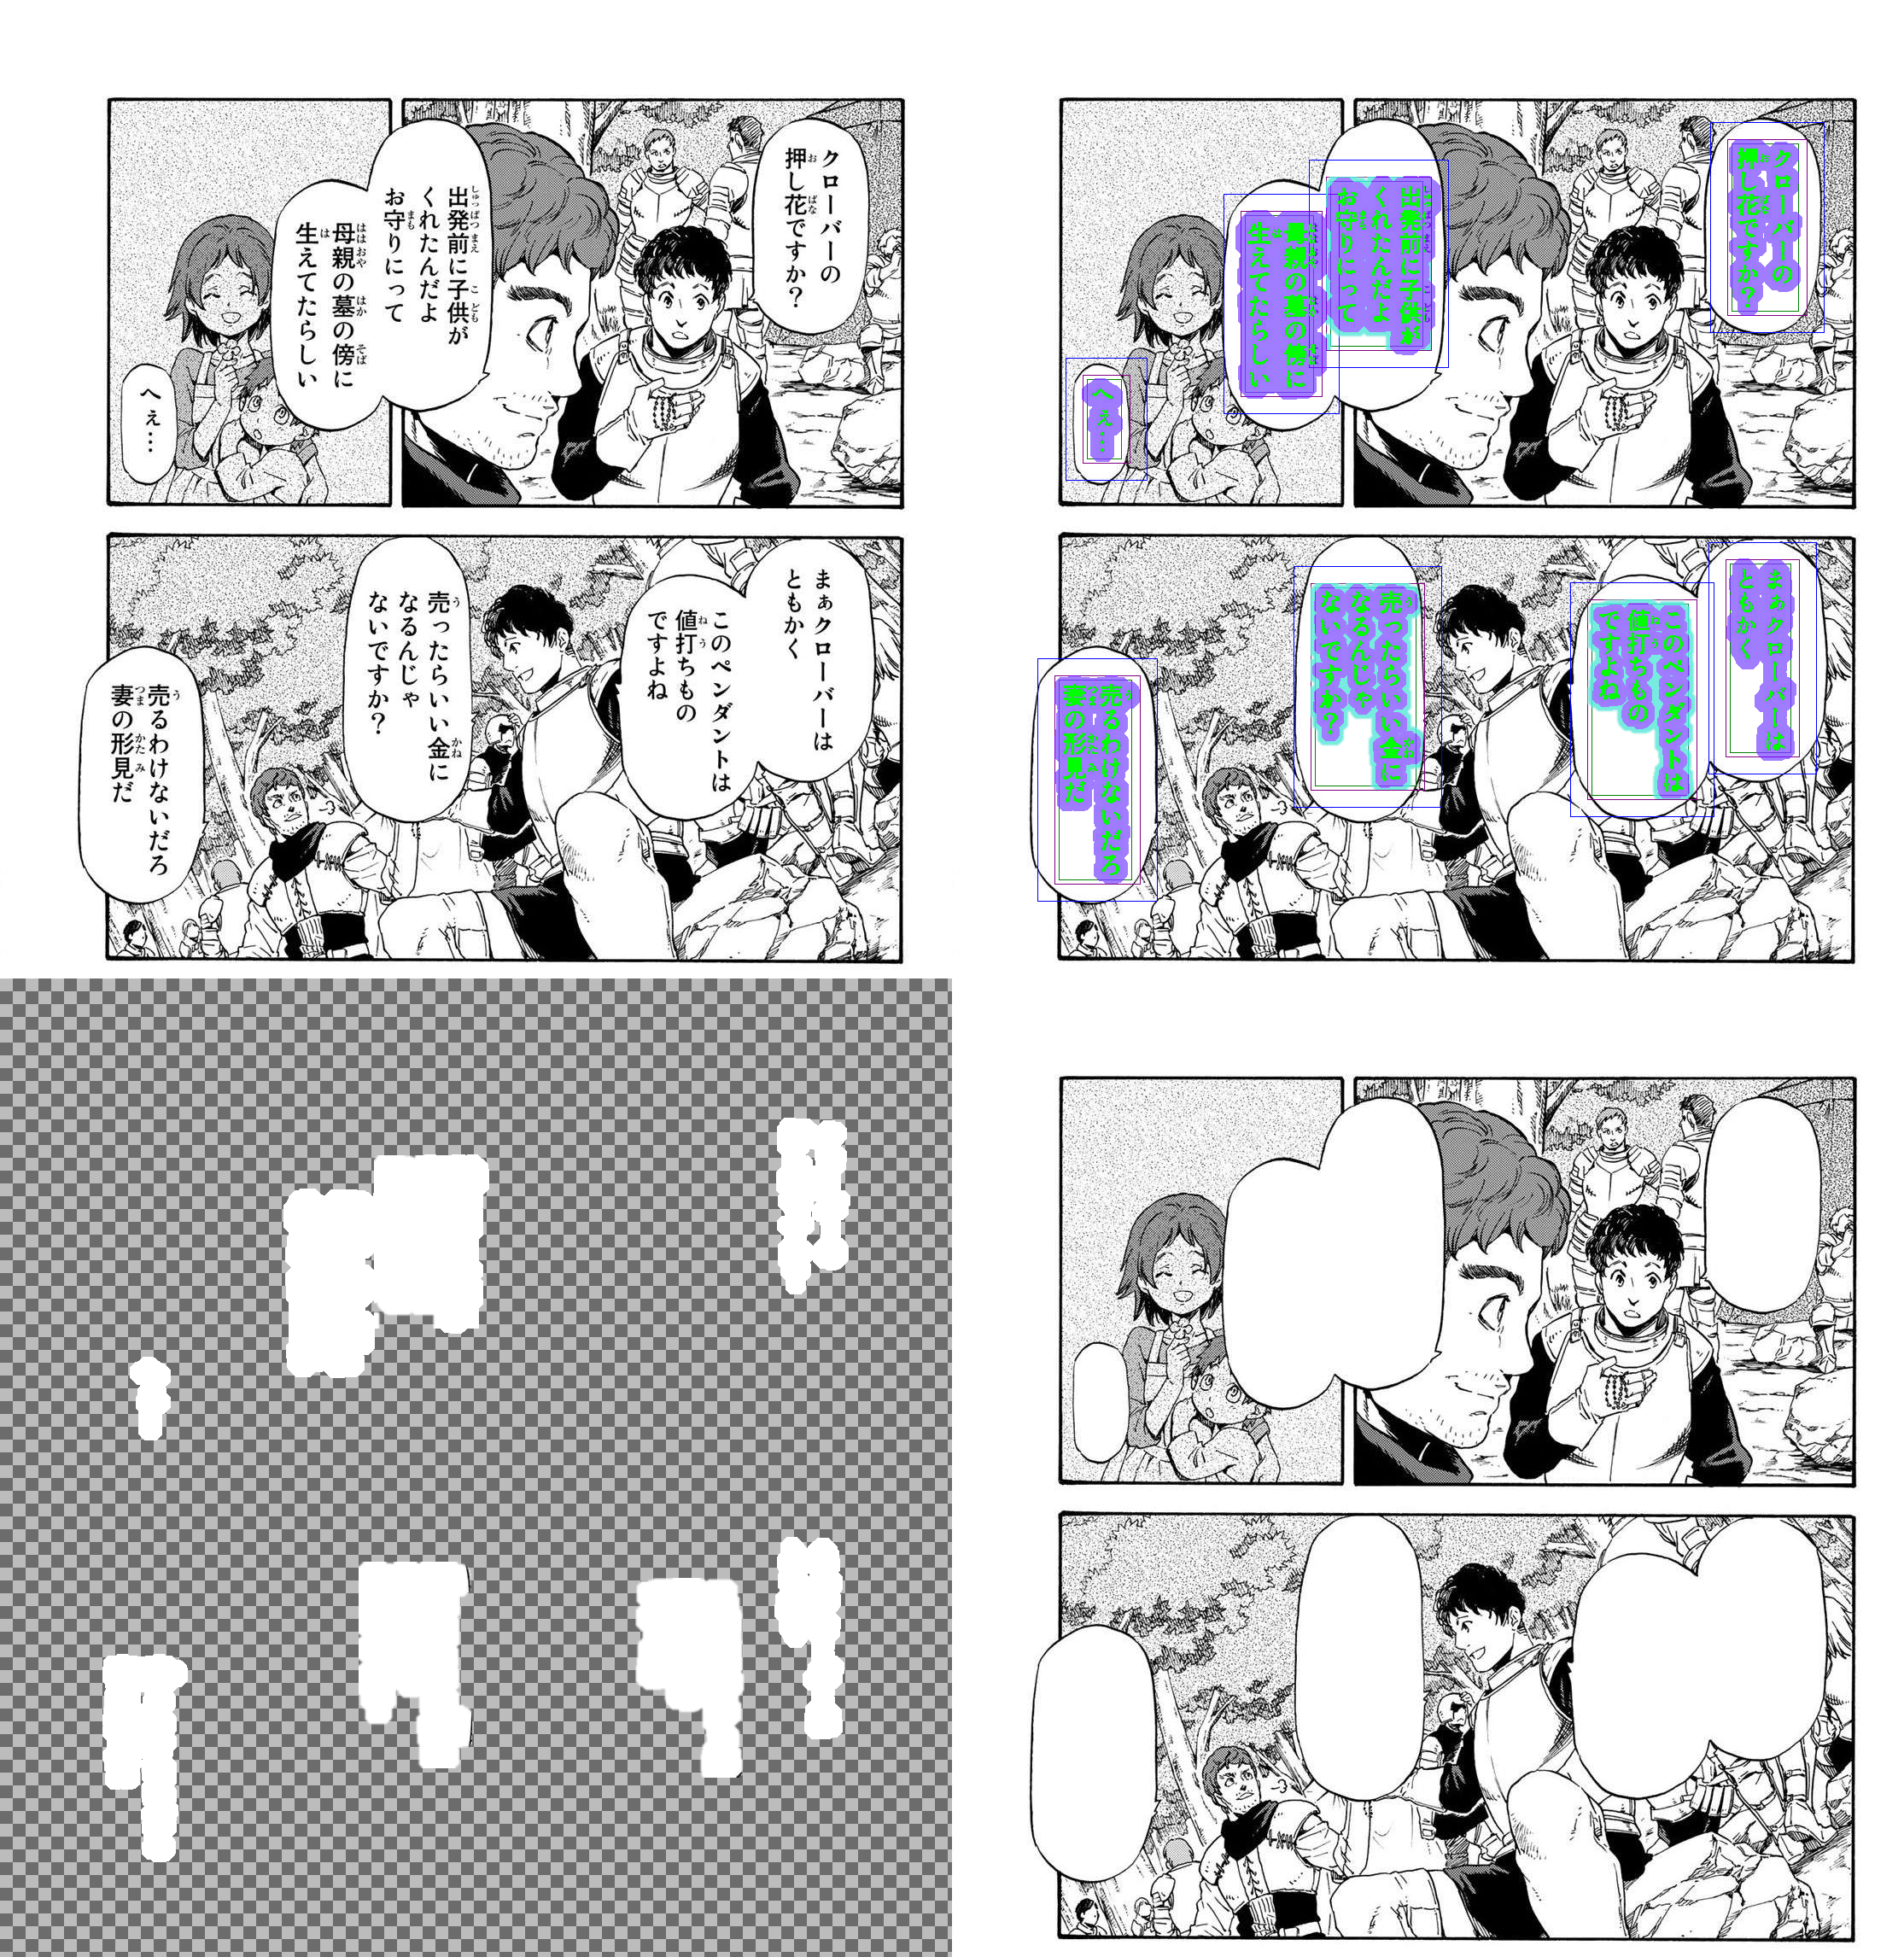

Visualized in the top right page:
- Various boxes are drawn where the AI found text.
- (Green) The AI also generates a precise mask where it detected text.
- (Purple) These masks are expanded to cover any nearby text that wasn't detected, as well as jpeg artifacts.
- (Blue) For masks that are a tight fit, the border around the edge of the mask is denoised for final clean-up, without affecting the rest of the image.
The two bottom pages are what the program can output: either just the transparent mask layer and/or the mask applied to the original image, cleaning it.
## Contents
> [Features](#features) \
> [Limitations](#limitations) \
> [Why Use This Program?](#why-use-this-program) \
> [Installation](#installation) \
> [Usage](#usage) \
> [Profiles](#profiles) \
> [OCR](#ocr) \
> [Examples](#examples-of-tricky-bubbles) \
> [Acknowledgements](#acknowledgements) \
> [License](#license) \
> [Roadmap](#roadmap) \
> [FAQ (Frequently Asked Questions)](https://github.com/VoxelCubes/PanelCleaner/blob/master/docs/faq.md) \
> [Translating](https://github.com/VoxelCubes/PanelCleaner/blob/master/translations/TRANSLATING.md)
## Features
- Cleans text bubbles without leaving artifacts.
- Avoids painting over parts of the image that aren't text.
- Inpaints bubbles (with LaMa machine learning) that can't simply be masked out.
- Ignores bubbles containing only symbols or numbers, as those don't need translation.
- Offers a GUI for easy use, dark, light, and system themes are supported.
- No internet connection required after installing the model data.
- Offers a plethora of options to customize the cleaning process and the ability to save multiple presets as profiles.
See the [default profile](https://github.com/VoxelCubes/PanelCleaner/blob/master/media/default.conf) for a list of all options.
- Provides detailed analytics on the cleaning process, to see how your settings affect the results.
- Supports CUDA acceleration, if installed as a python package and your hardware supports it.
- Supports batch processing of images and directories.
- Can handle bubbles on any solid background color.
- Can also cut out the text from the rest of the image, e.g. to paste it over a colored rendition.
- Can also run OCR on the pages and output the text to a file.
- Review cleaning and OCR output, including editing the OCR output interactively before saving it.
- Interface available in: English, German, Bulgarian, Spanish
(See [Translating](https://github.com/VoxelCubes/PanelCleaner/blob/master/translations/TRANSLATING.md) for more languages)
## Limitations
- It only supports Japanese and English text for cleaning (success may vary with other languages), Japanese only for OCR.
- Supported file types: .jpeg, .jpg, .png, .bmp, .tiff, .tif, .jp2, .dib, .webp, .ppm
- Supported file types (export only): .psd
- The program relies on AI for the initial text detection, which by nature is imperfect. Sometimes it will miss little bits of text or think part of the bubble belongs to the text, which will prevent that bubble from being cleaned. From testing, this typically affects between 2–8% of bubbles, depending on your settings.
- Due to the conservative approach taken in the selection of masks, if the program can't clean the bubble to a satisfying degree, it will skip that bubble outright. This does, however, also prevent false positives.
- For masks, only grayscale is currently supported. This means it can cover up text in white, black, or gray bubbles, but not colored ones.
## Why Use This Program?
This program is designed to precisely and fully clean text bubbles, without leaving any artifacts.
Its aim is to save a cleaner's time, by taking care of monotonous work.
The [AI](https://github.com/dmMaze/comic-text-detector) used to detect text and generate the initial mask was *not* created as part of this project, this project merely uses it as a starting point and improves upon the output.
| Original | AI Output | Panel Cleaner |
|:------------------------------------:|:-----------------------------------:|:--------------------------------------:|
| 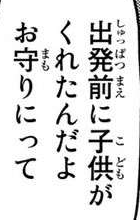 | 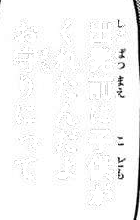 |  |
As you can see, with a bit of extra cleanup applied to the AI output, some leftover text and jpeg compression artifacts are removed, and the bubble is fully cleaned. \
When fully cleaning it isn't possible, Panel Cleaner will instead skip the bubble so as not to waste your time with a poorly cleaned bit of text. The exact cleaning behavior is highly configurable, see [Profiles](#profiles) for more details.
## Installation
You have the choice between installing a pre-built binary (exe or elf) from the [releases section](https://github.com/VoxelCubes/PanelCleaner/releases/latest) (**recommended for most users**),
or installing it to your local python interpreter using pip.
Note: All versions will need to download model data on first launch (approx. 500MB). This model data will not need to be downloaded again if Panel Cleaner updates.
Important: The pre-built binaries do not support CUDA acceleration. To use CUDA, you must install the program with pip and ensure you install the appropriate [pytorch](https://pytorch.org/get-started/locally/) version for your system.
### Install with Pip
The program requires **Python 3.10 or newer**.
Install the program with both the command line interface and graphical interface using pip from [PyPI](https://pypi.org/project/pcleaner/):
```bash
pip install pcleaner
```
Or if you only wish to use the command line interface:
```bash
pip install pcleaner-cli
```
Note: `pcleaner` and `pcleaner-cli` can be installed side by side, but the CLI-only package would be redundant.
Note: The program has been tested to work on Linux, MacOS, and Windows, with varying levels of setup required. See the [FAQ](https://github.com/VoxelCubes/PanelCleaner/blob/master/docs/faq.md) for help.
### Installation from the Arch User Repository
This installs the program in a `pipx` environment, which allows pytorch to download the appropriate CUDA version for your system, making this the best method of installation.
You can find the package here: [panelcleaner](https://aur.archlinux.org/packages/panelcleaner)
This will provide the `pcleaner` and `pcleaner-gui` commands, along with a desktop file for the GUI.
Install it with your favorite AUR helper, e.g. with `yay`:
```bash
yay -S panelcleaner
```
### Installation with Flatpak
This installs the prebuilt binary in a flatpak container, which does not support CUDA acceleration.
[Get it on Flathub](https://flathub.org/apps/io.github.voxelcubes.panelcleaner)
### Install with Docker
Build the image with buildx:
```bash
docker buildx build -t pcleaner:v1 .
```
Or with the legacy builder:
```bash
docker image build -t pcleaner:v1 .
```
Then initialize the docker image, specifying a root folder for the container to access.
In this example, the current directory (`pwd`) is used:
```bash
docker run -it --name pcleaner -v $(pwd):/app pcleaner:v1
```
This will also start an interactive shell in the container.
You can open another one later on with:
```bash
docker start pcleaner
docker exec -it pcleaner bash
```
## Command Line Usage
The program can be run from the command line, and, in the most common use, takes any number of images or directories as input. The program will create a new directory called `cleaned` in the same directory as the input files, and place the cleaned images and/or masks there. Often, it's more useful to only export the mask layer, and you can do so by adding the `--save-only-mask`, or `-m` for short, option.
Examples:
```bash
pcleaner clean image1.png image2.png image3.png
pcleaner clean -m folder1 image1.png
```
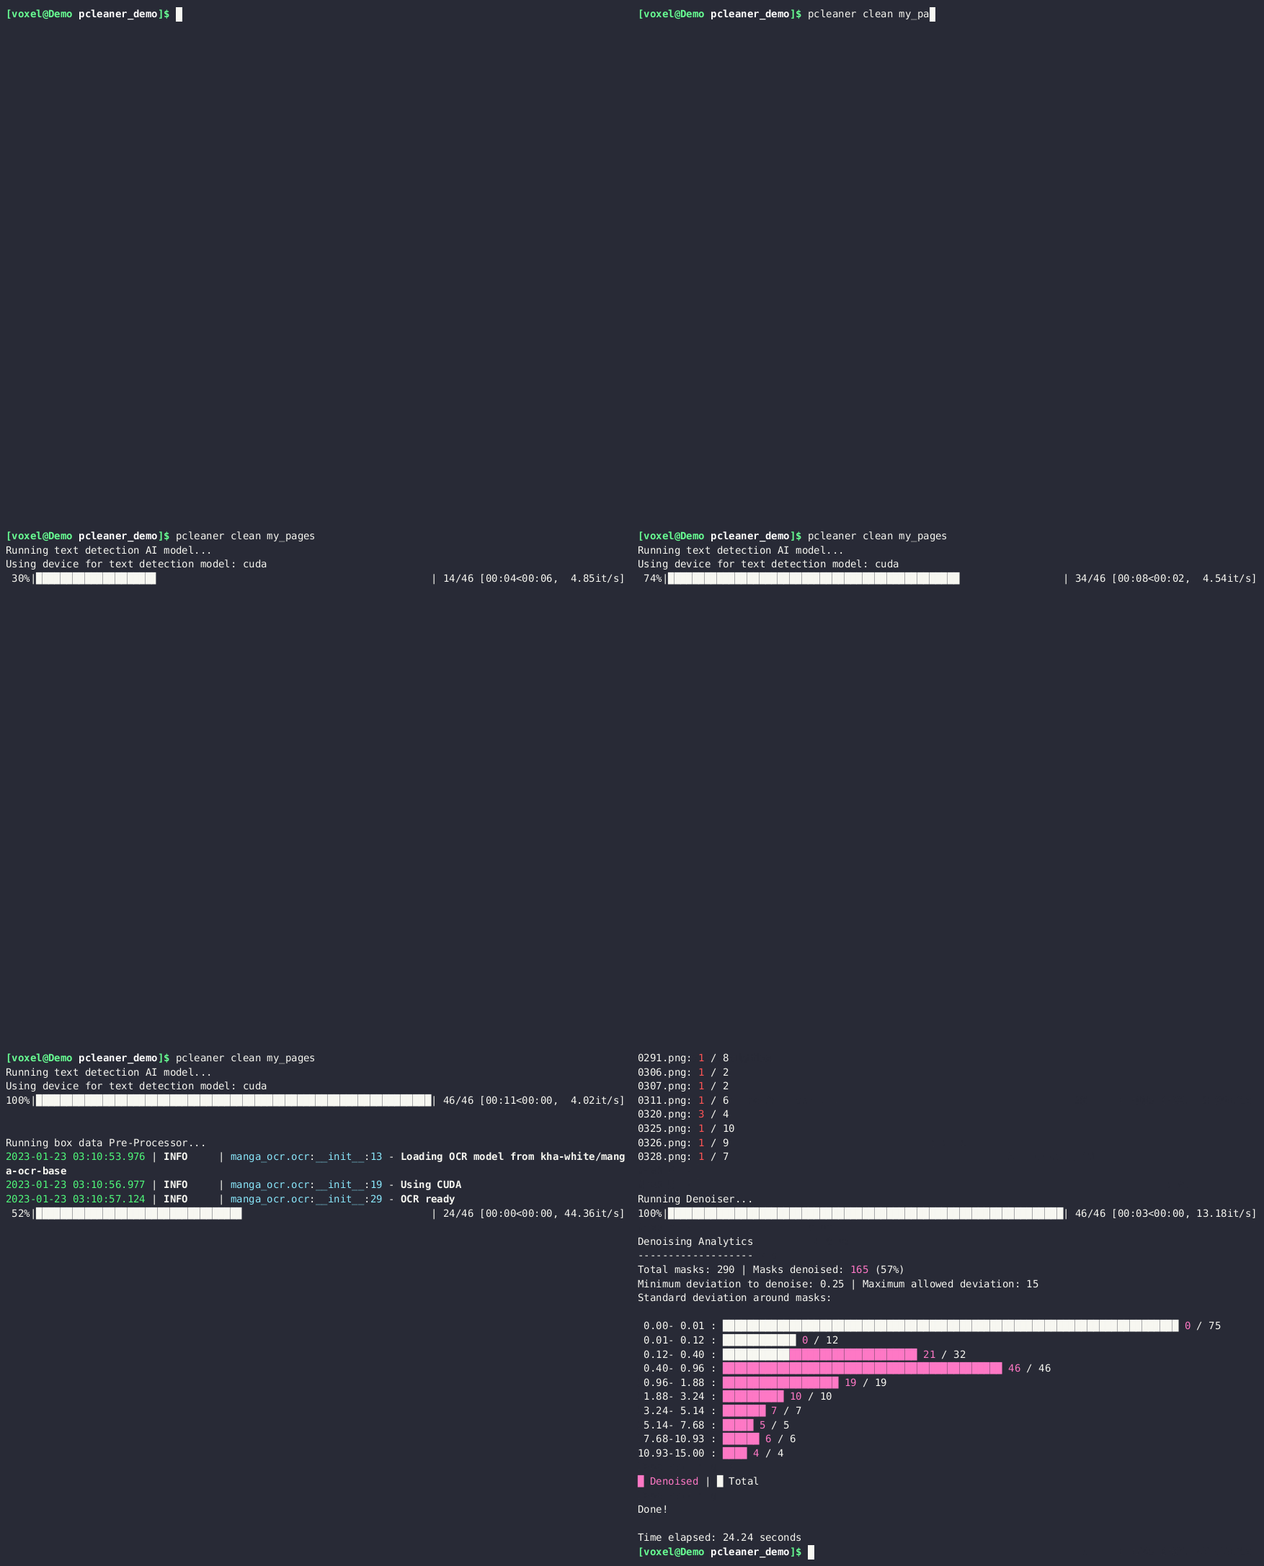
Demonstration with 46 images, real time, with CUDA acceleration.
There are many more options, which can be seen by running
```bash
pcleaner --help
```
### Launching the GUI using the Command Line
The GUI can be launched from the command line using the `gui` command:
```bash
pcleaner gui
```
or directly with
```bash
pcleaner-gui
```
If pcleaner cannot be found, ensure it is in your PATH variable, or try
```bash
python -m pcleaner
```
instead.
## Profiles
The program exposes every setting possible in a configuration profile, which are saved as simple text files and can also be accessed using the GUI. Each configuration option is explained inside the file itself, allowing you to optimize each parameter of the cleaning process for your specific needs. \
Just generate a new profile with
```bash
pcleaner profile new my_profile_name_here
```
and it will open your new profile for you in a text editor. \
Here is a tiny snippet from the default profile, for example:
```ini
# Number of pixels to grow the mask by each step.
# This bulks up the outline of the mask, so smaller values will be more accurate but slower.
mask_growth_step_pixels = 2
# Number of steps to grow the mask by.
# A higher number will make more and larger masks, ultimately limited by the reference box size.
mask_growth_steps = 11
```
Run the cleaner with your specified profile by adding `--profile=my_profile_name_here` or
`-p my_profile_name_here` to the command.
If you are having trouble seeing how the settings affect the results, you can use the
`--cache-masks` option to save visualizations of intermediate steps to the cache directory.
| Default Profile | Custom Profile |
| ---------------------------------------------- | ------------------------------------------- |
|  |  |
| mask_growth_step_pixels = 2 | mask_growth_step_pixels = 4 |
| mask_growth_steps = 11 | mask_growth_steps = 4 |
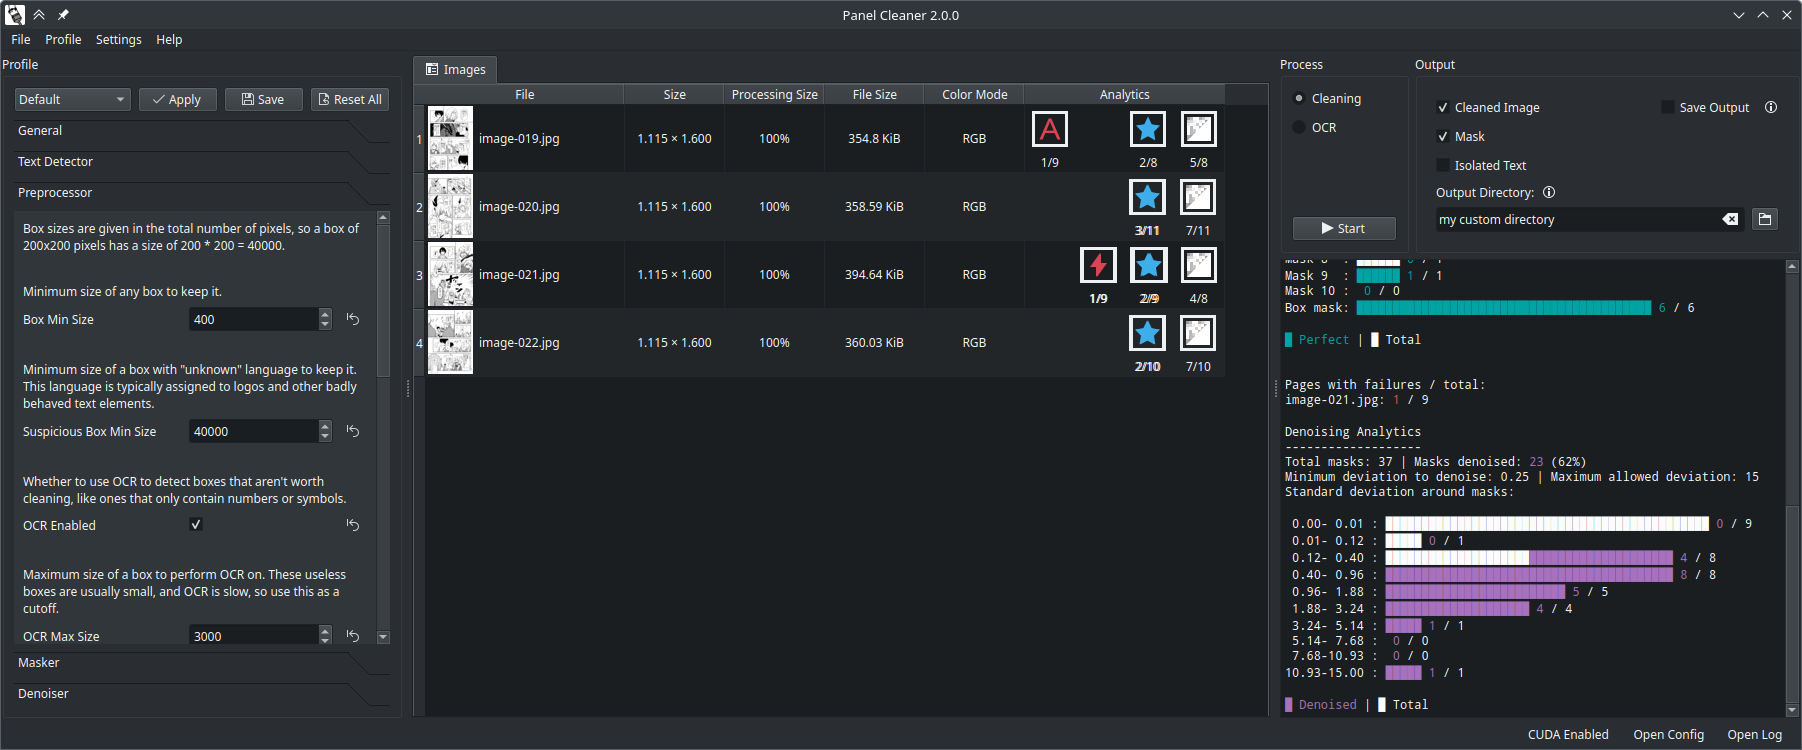
Additionally, analytics are provided for each processing step in the terminal, so you can see how your settings affect the results on a whole.
See the [default profile](https://github.com/VoxelCubes/PanelCleaner/blob/master/media/default.conf) for a list of all options.
Note: The default profile is optimized for images roughly 1100x1600 pixels in size.
Adjust size parameters accordingly in a profile if you are using images with a significantly
lower or higher resolution.
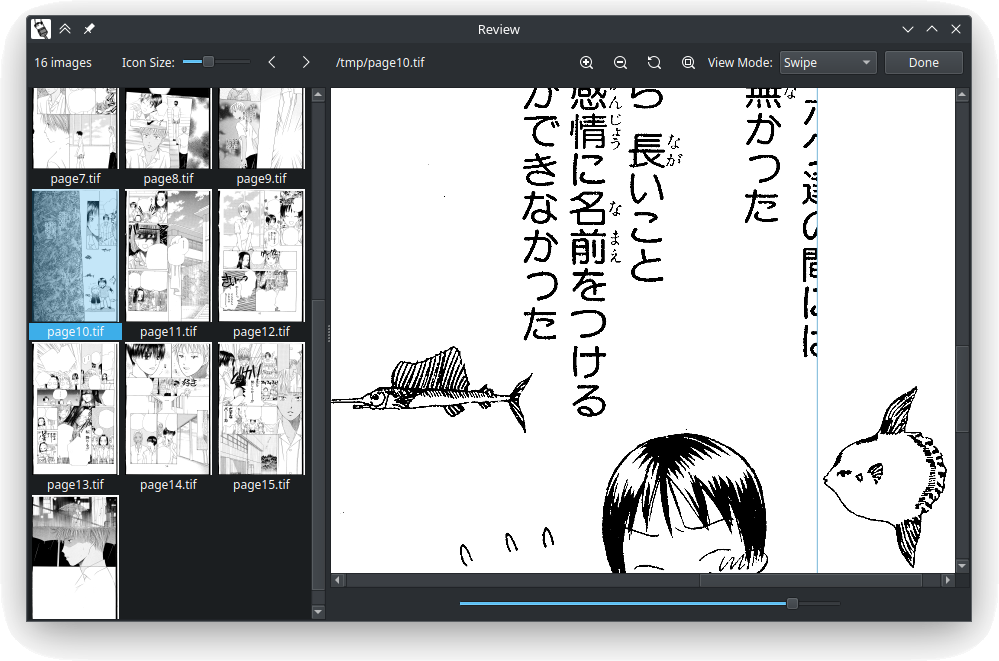
Review your settings with a selection of view modes before exporting the cleaned images.
## OCR
You can also use Panel Cleaner to perform Optical Character Recognition (OCR) on the pages,
and output the text to a file. This could be useful to assist in translation, or to extract
text for analytical purposes. \
You can run OCR with:
```bash
pcleaner ocr myfolder --output-path=output.txt
```
Panel Cleaner handles Japanese OCR with [MangaOCR](https://github.com/kha-white/manga-ocr) out of the box, and that is the preferred way to OCR Japanese text.
If available, Panel Cleaner can also use Tesseract for OCR capabilities, specifically for processing English and
Japanese text, the only two languages currently supported.
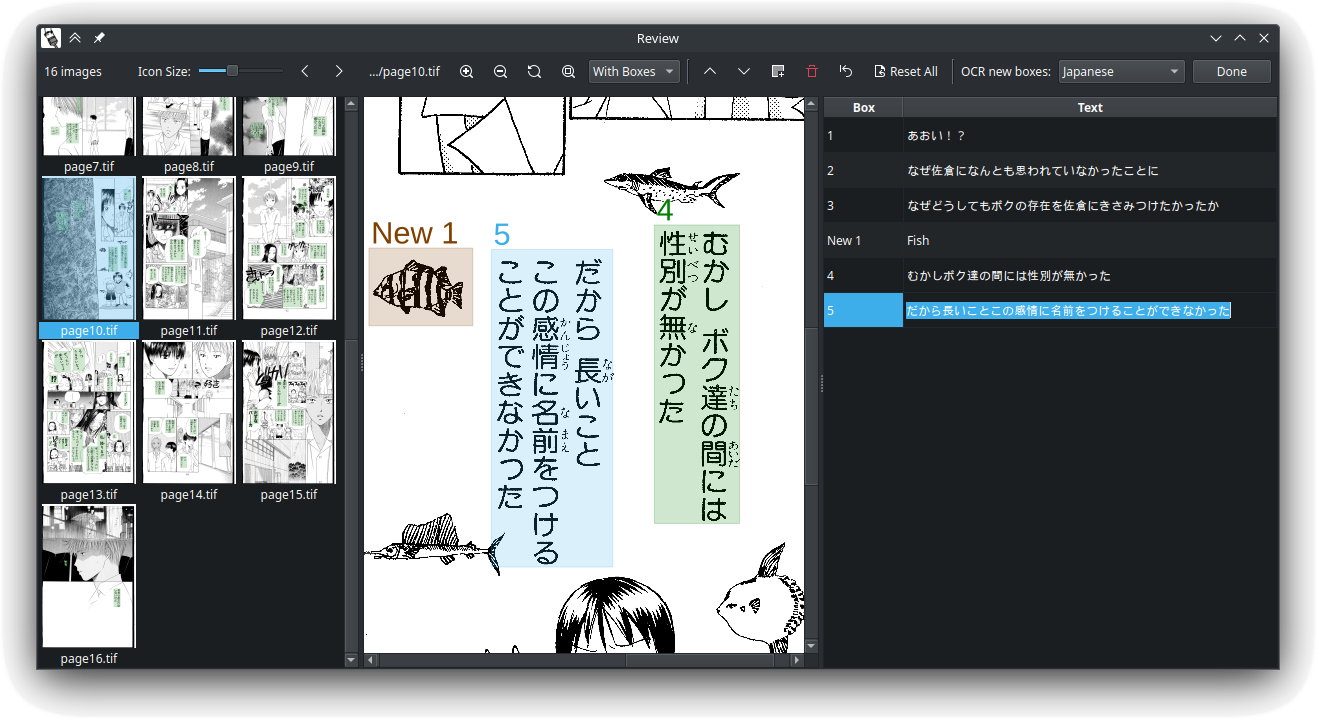
This is also available in the GUI, as the OCR output option.
You can review and edit the OCR output interactively there too.
Follow the instructions below to install Tesseract on your system.
### Installing Tesseract
#### Windows
1. Download the installer from the [official Tesseract GitHub repository](https://github.com/tesseract-ocr/tessdoc?tab=readme-ov-file#releases-and-changelog).
We recommend getting the latest version from UB Mannheim linked there (64 bit).
2. Run the installer and follow the on-screen instructions for a system-wide installation.
3. Add the Tesseract installation directory to your PATH environment variable.
If you did the system-wide installation, this will mean adding the directory `C:\Program Files\Tesseract-OCR` [to your PATH](https://www.computerhope.com/issues/ch000549.htm).
4. Restart your computer.
#### macOS
Use Homebrew to install Tesseract:
```bash
brew install tesseract
```
#### Linux
For Debian-based distributions, use apt:
```bash
sudo apt install tesseract-ocr
```
For other distributions, refer to your package manager and the [official Tesseract documentation](https://tesseract-ocr.github.io/tessdoc/Home.html).
For detailed installation instructions and additional information, please refer to the [official Tesseract documentation](https://tesseract-ocr.github.io/tessdoc/).
> Note: While Tesseract supports additional languages, Panel Cleaner will only utilize Tesseract for English and Japanese text recognition. English is installed by default. Follow the instructions here [Installing additional language packs](https://ocrmypdf.readthedocs.io/en/latest/languages.html) to install the Japanese language pack.
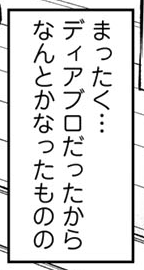
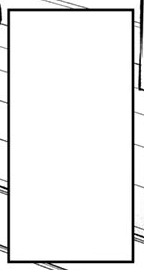
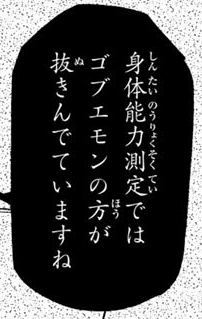
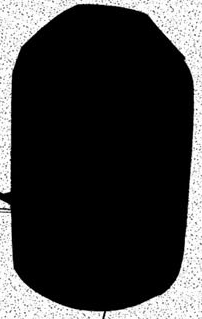
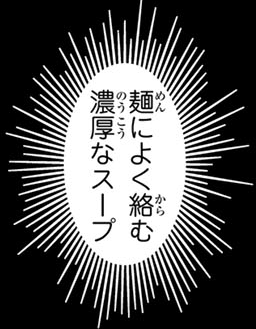
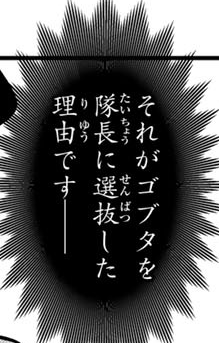
## Examples of Tricky Bubbles
| Original | Cleaned |
|:--------:|:-------:|
|  |  |
|  |  |
|  |  |
|  |  |
|  |  |
| 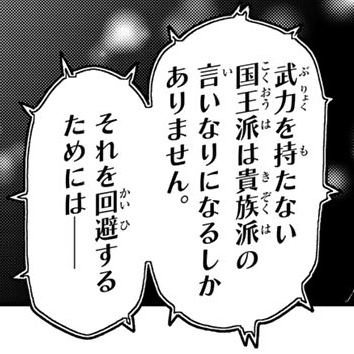 | 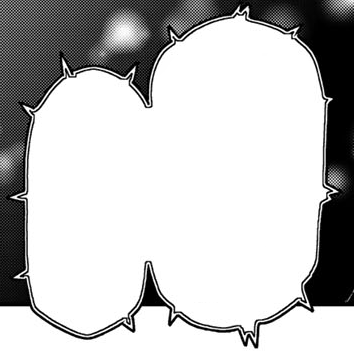 |
| 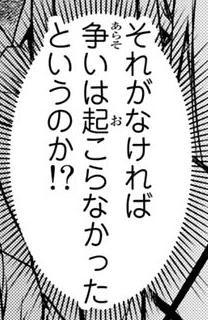 | 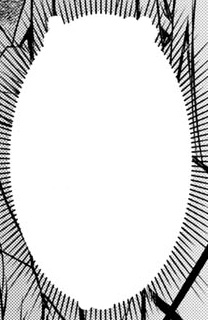 |
## Acknowledgements
- [Comic Text Detector](https://github.com/dmMaze/comic-text-detector) for finding text bubbles and generating the initial mask.
- [Manga OCR](https://github.com/kha-white/manga-ocr) for detecting which bubbles only contain symbols or numbers,
and performing the dedicated OCR command.
- [Simple Lama Inpainting](https://github.com/enesmsahin/simple-lama-inpainting) for inpainting bubbles that can't be masked out.
Using the fine-tuned [Model by dreMaz](https://huggingface.co/dreMaz/AnimeMangaInpainting).
## License
This project is licensed under the GNU General Public License v3.0 – see
the [LICENSE](https://raw.githubusercontent.com/VoxelCubes/PanelCleaner/master/LICENSE) file for details.
## Roadmap
- Currently no new features are planned.
Raw data
{
"_id": null,
"home_page": "https://github.com/VoxelCubes/PanelCleaner",
"name": "pcleaner",
"maintainer": null,
"docs_url": null,
"requires_python": ">=3.10",
"maintainer_email": null,
"keywords": "image processing, cleaning, text removal, manga, ai, machine learning",
"author": null,
"author_email": null,
"download_url": "https://files.pythonhosted.org/packages/ba/58/e7ed6d1472f87e2c6b9ee8f79a185dced0a8e1d26634936934f5d4ca83ee/pcleaner-2.11.9.tar.gz",
"platform": null,
"description": "# Panel Cleaner\n\n[](https://www.gnu.org/licenses/gpl-3.0)\n[](https://github.com/voxelcubes/PanelCleaner/releases)\n[](https://pypi.org/project/pcleaner/)\n[](https://github.com/psf/black)\n[](https://crowdin.com/project/panel-cleaner)\n\nThis tool uses machine learning to find text and then generates masks to cover it up with the highest accuracy possible. It is designed to clean easy bubbles, no in-painting or out-of-bubble text removal is done. This is intended to save a lot of monotonous work for people who have to clean a lot of panels, while making sure it doesn't paint over anything that it wasn't supposed to.\n\n\n\n\n\n\n\n\nVisualized in the top right page: \n\n- Various boxes are drawn where the AI found text. \n\n- (Green) The AI also generates a precise mask where it detected text. \n\n- (Purple) These masks are expanded to cover any nearby text that wasn't detected, as well as jpeg artifacts.\n\n- (Blue) For masks that are a tight fit, the border around the edge of the mask is denoised for final clean-up, without affecting the rest of the image.\n\nThe two bottom pages are what the program can output: either just the transparent mask layer and/or the mask applied to the original image, cleaning it.\n\n## Contents\n> [Features](#features) \\\n> [Limitations](#limitations) \\\n> [Why Use This Program?](#why-use-this-program) \\\n> [Installation](#installation) \\\n> [Usage](#usage) \\\n> [Profiles](#profiles) \\\n> [OCR](#ocr) \\\n> [Examples](#examples-of-tricky-bubbles) \\\n> [Acknowledgements](#acknowledgements) \\\n> [License](#license) \\\n> [Roadmap](#roadmap) \\\n> [FAQ (Frequently Asked Questions)](https://github.com/VoxelCubes/PanelCleaner/blob/master/docs/faq.md) \\\n> [Translating](https://github.com/VoxelCubes/PanelCleaner/blob/master/translations/TRANSLATING.md) \n\n\n## Features\n\n- Cleans text bubbles without leaving artifacts.\n\n- Avoids painting over parts of the image that aren't text.\n\n- Inpaints bubbles (with LaMa machine learning) that can't simply be masked out.\n\n- Ignores bubbles containing only symbols or numbers, as those don't need translation.\n\n- Offers a GUI for easy use, dark, light, and system themes are supported.\n\n- No internet connection required after installing the model data.\n\n- Offers a plethora of options to customize the cleaning process and the ability to save multiple presets as profiles.\n See the [default profile](https://github.com/VoxelCubes/PanelCleaner/blob/master/media/default.conf) for a list of all options.\n\n- Provides detailed analytics on the cleaning process, to see how your settings affect the results.\n\n- Supports CUDA acceleration, if installed as a python package and your hardware supports it.\n\n- Supports batch processing of images and directories.\n\n- Can handle bubbles on any solid background color.\n\n- Can also cut out the text from the rest of the image, e.g. to paste it over a colored rendition.\n\n- Can also run OCR on the pages and output the text to a file.\n\n- Review cleaning and OCR output, including editing the OCR output interactively before saving it.\n\n- Interface available in: English, German, Bulgarian, Spanish\n(See [Translating](https://github.com/VoxelCubes/PanelCleaner/blob/master/translations/TRANSLATING.md) for more languages)\n\n\n## Limitations\n\n- It only supports Japanese and English text for cleaning (success may vary with other languages), Japanese only for OCR.\n\n- Supported file types: .jpeg, .jpg, .png, .bmp, .tiff, .tif, .jp2, .dib, .webp, .ppm\n- Supported file types (export only): .psd\n\n- The program relies on AI for the initial text detection, which by nature is imperfect. Sometimes it will miss little bits of text or think part of the bubble belongs to the text, which will prevent that bubble from being cleaned. From testing, this typically affects between 2\u20138% of bubbles, depending on your settings.\n\n- Due to the conservative approach taken in the selection of masks, if the program can't clean the bubble to a satisfying degree, it will skip that bubble outright. This does, however, also prevent false positives.\n\n- For masks, only grayscale is currently supported. This means it can cover up text in white, black, or gray bubbles, but not colored ones.\n\n\n## Why Use This Program?\n\nThis program is designed to precisely and fully clean text bubbles, without leaving any artifacts.\nIts aim is to save a cleaner's time, by taking care of monotonous work.\nThe [AI](https://github.com/dmMaze/comic-text-detector) used to detect text and generate the initial mask was *not* created as part of this project, this project merely uses it as a starting point and improves upon the output.\n\n| Original | AI Output | Panel Cleaner |\n|:------------------------------------:|:-----------------------------------:|:--------------------------------------:|\n|  |  |  |\n\nAs you can see, with a bit of extra cleanup applied to the AI output, some leftover text and jpeg compression artifacts are removed, and the bubble is fully cleaned. \\\nWhen fully cleaning it isn't possible, Panel Cleaner will instead skip the bubble so as not to waste your time with a poorly cleaned bit of text. The exact cleaning behavior is highly configurable, see [Profiles](#profiles) for more details.\n\n\n## Installation\n\nYou have the choice between installing a pre-built binary (exe or elf) from the [releases section](https://github.com/VoxelCubes/PanelCleaner/releases/latest) (**recommended for most users**),\nor installing it to your local python interpreter using pip.\n\nNote: All versions will need to download model data on first launch (approx. 500MB). This model data will not need to be downloaded again if Panel Cleaner updates.\n\nImportant: The pre-built binaries do not support CUDA acceleration. To use CUDA, you must install the program with pip and ensure you install the appropriate [pytorch](https://pytorch.org/get-started/locally/) version for your system.\n\n### Install with Pip\n\nThe program requires **Python 3.10 or newer**.\n\nInstall the program with both the command line interface and graphical interface using pip from [PyPI](https://pypi.org/project/pcleaner/):\n```bash\npip install pcleaner\n```\n\nOr if you only wish to use the command line interface:\n```bash\npip install pcleaner-cli\n```\nNote: `pcleaner` and `pcleaner-cli` can be installed side by side, but the CLI-only package would be redundant.\n\nNote: The program has been tested to work on Linux, MacOS, and Windows, with varying levels of setup required. See the [FAQ](https://github.com/VoxelCubes/PanelCleaner/blob/master/docs/faq.md) for help.\n\n### Installation from the Arch User Repository\n\nThis installs the program in a `pipx` environment, which allows pytorch to download the appropriate CUDA version for your system, making this the best method of installation.\n\nYou can find the package here: [panelcleaner](https://aur.archlinux.org/packages/panelcleaner)\n\nThis will provide the `pcleaner` and `pcleaner-gui` commands, along with a desktop file for the GUI.\n\nInstall it with your favorite AUR helper, e.g. with `yay`:\n```bash\nyay -S panelcleaner\n```\n\n### Installation with Flatpak\n\nThis installs the prebuilt binary in a flatpak container, which does not support CUDA acceleration.\n\n[Get it on Flathub](https://flathub.org/apps/io.github.voxelcubes.panelcleaner)\n\n### Install with Docker\n\nBuild the image with buildx:\n```bash\ndocker buildx build -t pcleaner:v1 .\n```\nOr with the legacy builder:\n```bash\ndocker image build -t pcleaner:v1 .\n```\n\nThen initialize the docker image, specifying a root folder for the container to access.\nIn this example, the current directory (`pwd`) is used:\n```bash\ndocker run -it --name pcleaner -v $(pwd):/app pcleaner:v1\n```\nThis will also start an interactive shell in the container.\n\nYou can open another one later on with:\n```bash\ndocker start pcleaner\ndocker exec -it pcleaner bash\n```\n\n## Command Line Usage\n\nThe program can be run from the command line, and, in the most common use, takes any number of images or directories as input. The program will create a new directory called `cleaned` in the same directory as the input files, and place the cleaned images and/or masks there. Often, it's more useful to only export the mask layer, and you can do so by adding the `--save-only-mask`, or `-m` for short, option.\n\nExamples:\n```bash\npcleaner clean image1.png image2.png image3.png\n\npcleaner clean -m folder1 image1.png\n```\n\nDemonstration with 46 images, real time, with CUDA acceleration.\n\n\nThere are many more options, which can be seen by running\n```bash\npcleaner --help\n```\n\n### Launching the GUI using the Command Line\n\nThe GUI can be launched from the command line using the `gui` command:\n```bash\npcleaner gui\n```\nor directly with\n```bash\npcleaner-gui\n```\n\nIf pcleaner cannot be found, ensure it is in your PATH variable, or try\n```bash\npython -m pcleaner\n```\ninstead.\n\n\n## Profiles\n\nThe program exposes every setting possible in a configuration profile, which are saved as simple text files and can also be accessed using the GUI. Each configuration option is explained inside the file itself, allowing you to optimize each parameter of the cleaning process for your specific needs. \\\nJust generate a new profile with\n```bash\npcleaner profile new my_profile_name_here\n```\n\nand it will open your new profile for you in a text editor. \\\nHere is a tiny snippet from the default profile, for example:\n```ini\n# Number of pixels to grow the mask by each step. \n# This bulks up the outline of the mask, so smaller values will be more accurate but slower.\nmask_growth_step_pixels = 2\n\n# Number of steps to grow the mask by.\n# A higher number will make more and larger masks, ultimately limited by the reference box size.\nmask_growth_steps = 11\n```\n\nRun the cleaner with your specified profile by adding `--profile=my_profile_name_here` or\n`-p my_profile_name_here` to the command.\n\nIf you are having trouble seeing how the settings affect the results, you can use the \n`--cache-masks` option to save visualizations of intermediate steps to the cache directory.\n\n| Default Profile | Custom Profile |\n| ---------------------------------------------- | ------------------------------------------- |\n|  |  |\n| mask_growth_step_pixels = 2 | mask_growth_step_pixels = 4 |\n| mask_growth_steps = 11 | mask_growth_steps = 4 |\n\nAdditionally, analytics are provided for each processing step in the terminal, so you can see how your settings affect the results on a whole.\n\nSee the [default profile](https://github.com/VoxelCubes/PanelCleaner/blob/master/media/default.conf) for a list of all options.\n\nNote: The default profile is optimized for images roughly 1100x1600 pixels in size.\nAdjust size parameters accordingly in a profile if you are using images with a significantly\nlower or higher resolution.\n\nReview your settings with a selection of view modes before exporting the cleaned images.\n \n\n## OCR\n\nYou can also use Panel Cleaner to perform Optical Character Recognition (OCR) on the pages,\nand output the text to a file. This could be useful to assist in translation, or to extract\ntext for analytical purposes. \\\nYou can run OCR with:\n```bash\npcleaner ocr myfolder --output-path=output.txt\n```\n\nPanel Cleaner handles Japanese OCR with [MangaOCR](https://github.com/kha-white/manga-ocr) out of the box, and that is the preferred way to OCR Japanese text.\nIf available, Panel Cleaner can also use Tesseract for OCR capabilities, specifically for processing English and \nJapanese text, the only two languages currently supported.\n\nThis is also available in the GUI, as the OCR output option.\nYou can review and edit the OCR output interactively there too.\n \n\nFollow the instructions below to install Tesseract on your system.\n\n### Installing Tesseract\n\n#### Windows\n\n1. Download the installer from the [official Tesseract GitHub repository](https://github.com/tesseract-ocr/tessdoc?tab=readme-ov-file#releases-and-changelog).\nWe recommend getting the latest version from UB Mannheim linked there (64 bit).\n2. Run the installer and follow the on-screen instructions for a system-wide installation.\n3. Add the Tesseract installation directory to your PATH environment variable.\nIf you did the system-wide installation, this will mean adding the directory `C:\\Program Files\\Tesseract-OCR` [to your PATH](https://www.computerhope.com/issues/ch000549.htm).\n4. Restart your computer.\n\n#### macOS\n\nUse Homebrew to install Tesseract:\n\n```bash\nbrew install tesseract\n```\n\n#### Linux\n\nFor Debian-based distributions, use apt:\n\n```bash\nsudo apt install tesseract-ocr\n```\n\nFor other distributions, refer to your package manager and the [official Tesseract documentation](https://tesseract-ocr.github.io/tessdoc/Home.html).\n\nFor detailed installation instructions and additional information, please refer to the [official Tesseract documentation](https://tesseract-ocr.github.io/tessdoc/).\n\n> Note: While Tesseract supports additional languages, Panel Cleaner will only utilize Tesseract for English and Japanese text recognition. English is installed by default. Follow the instructions here [Installing additional language packs](https://ocrmypdf.readthedocs.io/en/latest/languages.html) to install the Japanese language pack. \n\n## Examples of Tricky Bubbles\n\n| Original | Cleaned |\n|:--------:|:-------:|\n|  |  |\n|  |  |\n|  |  |\n|  |  |\n|  |  |\n|  |  |\n|  |  |\n\n\n\n## Acknowledgements\n\n- [Comic Text Detector](https://github.com/dmMaze/comic-text-detector) for finding text bubbles and generating the initial mask.\n\n- [Manga OCR](https://github.com/kha-white/manga-ocr) for detecting which bubbles only contain symbols or numbers,\n and performing the dedicated OCR command.\n\n- [Simple Lama Inpainting](https://github.com/enesmsahin/simple-lama-inpainting) for inpainting bubbles that can't be masked out.\n Using the fine-tuned [Model by dreMaz](https://huggingface.co/dreMaz/AnimeMangaInpainting).\n\n\n## License\n\nThis project is licensed under the GNU General Public License v3.0 \u2013 see\nthe [LICENSE](https://raw.githubusercontent.com/VoxelCubes/PanelCleaner/master/LICENSE) file for details.\n\n\n## Roadmap\n\n- Currently no new features are planned.\n",
"bugtrack_url": null,
"license": null,
"summary": "An AI-powered tool to clean manga panels.",
"version": "2.11.9",
"project_urls": {
"Homepage": "https://github.com/VoxelCubes/PanelCleaner"
},
"split_keywords": [
"image processing",
" cleaning",
" text removal",
" manga",
" ai",
" machine learning"
],
"urls": [
{
"comment_text": null,
"digests": {
"blake2b_256": "d2f98f3e46004f9f521713452ee04cddcfb1f443a29c933bc2e510ff043faf3e",
"md5": "bb5bc73fe99ac10aa881ec8bd7827959",
"sha256": "0f92b2e57bd70ce208e749919644175100877c045318a2abccace3c7bfc35e71"
},
"downloads": -1,
"filename": "pcleaner-2.11.9-py3-none-any.whl",
"has_sig": false,
"md5_digest": "bb5bc73fe99ac10aa881ec8bd7827959",
"packagetype": "bdist_wheel",
"python_version": "py3",
"requires_python": ">=3.10",
"size": 1075286,
"upload_time": "2025-07-15T15:32:47",
"upload_time_iso_8601": "2025-07-15T15:32:47.061055Z",
"url": "https://files.pythonhosted.org/packages/d2/f9/8f3e46004f9f521713452ee04cddcfb1f443a29c933bc2e510ff043faf3e/pcleaner-2.11.9-py3-none-any.whl",
"yanked": false,
"yanked_reason": null
},
{
"comment_text": null,
"digests": {
"blake2b_256": "ba58e7ed6d1472f87e2c6b9ee8f79a185dced0a8e1d26634936934f5d4ca83ee",
"md5": "c3593f9d1b94e467807f97591dd05d0b",
"sha256": "e8bf450c56214703dfc465c53f44bfcf4b0fcf7d63c08741287fa4276241e667"
},
"downloads": -1,
"filename": "pcleaner-2.11.9.tar.gz",
"has_sig": false,
"md5_digest": "c3593f9d1b94e467807f97591dd05d0b",
"packagetype": "sdist",
"python_version": "source",
"requires_python": ">=3.10",
"size": 970131,
"upload_time": "2025-07-15T15:32:50",
"upload_time_iso_8601": "2025-07-15T15:32:50.990235Z",
"url": "https://files.pythonhosted.org/packages/ba/58/e7ed6d1472f87e2c6b9ee8f79a185dced0a8e1d26634936934f5d4ca83ee/pcleaner-2.11.9.tar.gz",
"yanked": false,
"yanked_reason": null
}
],
"upload_time": "2025-07-15 15:32:50",
"github": true,
"gitlab": false,
"bitbucket": false,
"codeberg": false,
"github_user": "VoxelCubes",
"github_project": "PanelCleaner",
"travis_ci": false,
"coveralls": false,
"github_actions": false,
"requirements": [
{
"name": "opencv-python",
"specs": []
},
{
"name": "Pillow",
"specs": []
},
{
"name": "torch",
"specs": []
},
{
"name": "torchvision",
"specs": []
},
{
"name": "tqdm",
"specs": []
},
{
"name": "numpy",
"specs": []
},
{
"name": "scipy",
"specs": []
},
{
"name": "pyclipper",
"specs": []
},
{
"name": "shapely",
"specs": []
},
{
"name": "natsort",
"specs": []
},
{
"name": "docopt-ng",
"specs": []
},
{
"name": "ConfigUpdater",
"specs": []
},
{
"name": "transformers",
"specs": []
},
{
"name": "manga_ocr",
"specs": []
},
{
"name": "loguru",
"specs": []
},
{
"name": "prettytable",
"specs": []
},
{
"name": "colorama",
"specs": []
},
{
"name": "requests",
"specs": []
},
{
"name": "xdg",
"specs": []
},
{
"name": "PySide6",
"specs": []
},
{
"name": "tifffile",
"specs": []
},
{
"name": "attrs",
"specs": []
},
{
"name": "psutil",
"specs": []
},
{
"name": "dictdiffer",
"specs": []
},
{
"name": "humanfriendly",
"specs": []
},
{
"name": "simple_lama_inpainting",
"specs": []
},
{
"name": "pytesseract",
"specs": []
},
{
"name": "psd-tools",
"specs": []
},
{
"name": "strenum",
"specs": []
},
{
"name": "dbus-python",
"specs": []
},
{
"name": "pywin32",
"specs": []
},
{
"name": "win10toast",
"specs": []
},
{
"name": "pyuac",
"specs": []
},
{
"name": "PyYAML",
"specs": []
}
],
"lcname": "pcleaner"
}
