<head>
<link rel="icon" type="image/png" href="https://raw.githubusercontent.com/ChenglongMa/SkinToneClassifier/main/docs/icon.svg">
</head>
<div style="text-align:center;">
<img src="https://raw.githubusercontent.com/ChenglongMa/SkinToneClassifier/main/docs/stone-logo.png" alt="stone logo">
<img src="https://raw.githubusercontent.com/ChenglongMa/SkinToneClassifier/main/docs/illustration.svg" alt="model illustration">
</div>

[](https://pypi.org/project/skin-tone-classifier/)
[](https://pypi.org/project/skin-tone-classifier/)
[](https://github.com/ChenglongMa/SkinToneClassifier/releases/latest)
[](https://github.com/ChenglongMa/SkinToneClassifier/blob/main/LICENSE)
[](https://youtube.com/playlist?list=PLYRpHlp-9V_E5ZLhW1hbNaVjS5Zg6b6kQ&si=ezxUR7McUbZa4clT)
[](https://colab.research.google.com/drive/1k-cryEZ9PInJRXWIi17ib66ufYV2Ikwe?usp=sharing)
[](https://github.com/ChenglongMa/SkinToneClassifier)
An easy-to-use library for skin tone classification.
This can be used to detect **face** or **skin area** in the specified images.
The detected skin tones are then classified into the specified color categories.
The library finally generates results to report the detected faces (if any),
dominant skin tones and color categories.
Check out the [Changelog](https://github.com/ChenglongMa/SkinToneClassifier/blob/main/CHANGELOG.md) for the latest updates.
*If you find this project helpful, please
consider [giving it a star](https://github.com/ChenglongMa/SkinToneClassifier)* ⭐. *It would be a great encouragement
for me!*
---
<!-- START doctoc generated TOC please keep comment here to allow auto update -->
<!-- DON'T EDIT THIS SECTION, INSTEAD RE-RUN doctoc TO UPDATE -->
**Table of Contents**
- [Showcases](#showcases)
- [PERLA Palette](#perla-palette)
- [YADON-OSTFELD Palette](#yadon-ostfeld-palette)
- [PRODER Palette](#proder-palette)
- [Video tutorials](#video-tutorials)
- [Playlist](#playlist)
- [1. How to install Python and `stone`](#1-how-to-install-python-and-stone)
- [2. Use `stone` in GUI mode](#2-use-stone-in-gui-mode)
- [3. Use `stone` in CLI mode](#3-use-stone-in-cli-mode)
- [4. Use `stone` in Python scripts](#4-use-stone-in-python-scripts)
- [Installation](#installation)
- [Install from pip](#install-from-pip)
- [Install the CLI mode only](#install-the-cli-mode-only)
- [Install the CLI mode and the GUI mode](#install-the-cli-mode-and-the-gui-mode)
- [Install from source](#install-from-source)
- [HOW TO USE](#how-to-use)
- [Quick Start](#quick-start)
- [Use `stone` in a GUI](#use-stone-in-a-gui)
- [Use `stone` in command line interface (CLI)](#use-stone-in-command-line-interface-cli)
- [Interpretation of the table](#interpretation-of-the-table)
- [Detailed Usage](#detailed-usage)
- [Use Cases](#use-cases)
- [1. Process multiple images](#1-process-multiple-images)
- [2. Specify color palette](#2-specify-color-palette)
- [3. Specify category labels](#3-specify-category-labels)
- [4. Specify output folder](#4-specify-output-folder)
- [5. Store report images for debugging](#5-store-report-images-for-debugging)
- [6. Specify the types of the input image(s)](#6-specify-the-types-of-the-input-images)
- [7. Convert the `color` images to `black/white` images](#7-convert-the-color-images-to-blackwhite-images)
- [8. Tune parameters of face detection](#8-tune-parameters-of-face-detection)
- [9. Multiprocessing settings](#9-multiprocessing-settings)
- [10. Used as a library by importing into other projects](#10-used-as-a-library-by-importing-into-other-projects)
- [11. Used in a FAST API project](#11-used-in-a-fast-api-project)
- [Citation](#citation)
- [Contributing](#contributing)
- [Disclaimer](#disclaimer)
<!-- END doctoc generated TOC please keep comment here to allow auto update -->
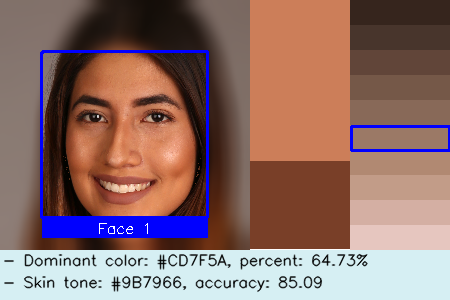
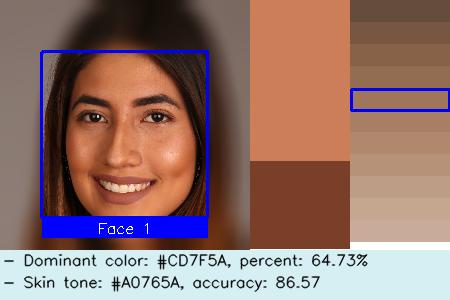
# Showcases
The following are some examples of the classification results using different palettes.
## PERLA Palette

## YADON-OSTFELD Palette

## PRODER Palette

# Video tutorials
[](https://youtube.com/playlist?list=PLYRpHlp-9V_E5ZLhW1hbNaVjS5Zg6b6kQ&si=ezxUR7McUbZa4clT)
Please visit the following video tutorials if you have no programming background or are unfamiliar with how to use Python and this library 💖
## Playlist
[](https://youtube.com/playlist?list=PLYRpHlp-9V_E5ZLhW1hbNaVjS5Zg6b6kQ&si=ezxUR7McUbZa4clT)
<details markdown="1">
<summary><i>Click here to show more.</i></summary>
## 1. How to install Python and `stone`
[](https://www.youtube.com/watch?v=vu6whI0qcmU&list=PLYRpHlp-9V_E5ZLhW1hbNaVjS5Zg6b6kQ&index=1)
[](https://www.youtube.com/watch?v=vu6whI0qcmU&list=PLYRpHlp-9V_E5ZLhW1hbNaVjS5Zg6b6kQ&index=1)
## 2. Use `stone` in GUI mode
[](https://www.youtube.com/watch?v=08apMEogZgs&list=PLYRpHlp-9V_E5ZLhW1hbNaVjS5Zg6b6kQ&index=2)
[](https://www.youtube.com/watch?v=08apMEogZgs&list=PLYRpHlp-9V_E5ZLhW1hbNaVjS5Zg6b6kQ&index=2)
## 3. Use `stone` in CLI mode
[](https://www.youtube.com/watch?v=rqJ62DijQaw&list=PLYRpHlp-9V_E5ZLhW1hbNaVjS5Zg6b6kQ&index=3)
[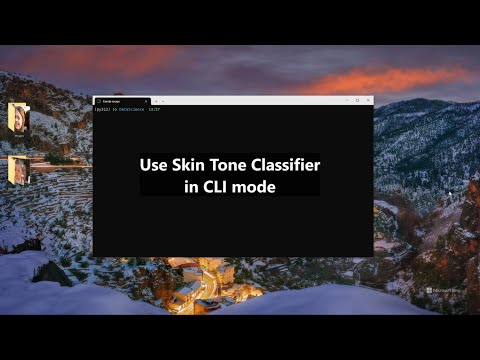](https://www.youtube.com/watch?v=rqJ62DijQaw&list=PLYRpHlp-9V_E5ZLhW1hbNaVjS5Zg6b6kQ&index=3)
## 4. Use `stone` in Python scripts
Please refer to this notebook [](https://colab.research.google.com/drive/1k-cryEZ9PInJRXWIi17ib66ufYV2Ikwe?usp=sharing) for more information.
_More videos are coming soon..._
</details>
# Installation
> [!TIP]
>
> Since v1.2.3, we have made the GUI mode **optional**.
>
## Install from pip
### Install the CLI mode only
```shell
pip install skin-tone-classifier --upgrade
```
It is useful for users who want to use this library in non-GUI environments, e.g., servers or [](https://colab.research.google.com/drive/1k-cryEZ9PInJRXWIi17ib66ufYV2Ikwe?usp=sharing).
### Install the CLI mode and the GUI mode
```shell
pip install skin-tone-classifier[all] --upgrade
```
It is useful for users who are not familiar with the command line interface and want to use the GUI mode.
## Install from source
```shell
git clone git@github.com:ChenglongMa/SkinToneClassifier.git
cd SkinToneClassifier
pip install -e . --verbose
```
> [!TIP]
>
> If you encounter the following problem:
>
> [`ImportError: DLL load failed while importing _core: The specified module could not be found`](https://stackoverflow.com/q/52306805/8860079)
>
> Please download and install **Visual C++ Redistributable** at [here](https://learn.microsoft.com/en-us/cpp/windows/latest-supported-vc-redist?view=msvc-170#visual-studio-2015-2017-2019-and-2022).
>
> Then this error will be gone.
# HOW TO USE
> [!TIP]
>
> You can combine the following documents, [the video tutorials above](#video-tutorials)
> and the running examples [](https://colab.research.google.com/drive/1k-cryEZ9PInJRXWIi17ib66ufYV2Ikwe?usp=sharing)
> to understand the usage of this library more intuitively.
>
## Quick Start
### Use `stone` in a GUI
✨ Since v1.2.0, we have provided a GUI version of `stone` for users who are not familiar with the command line
interface.
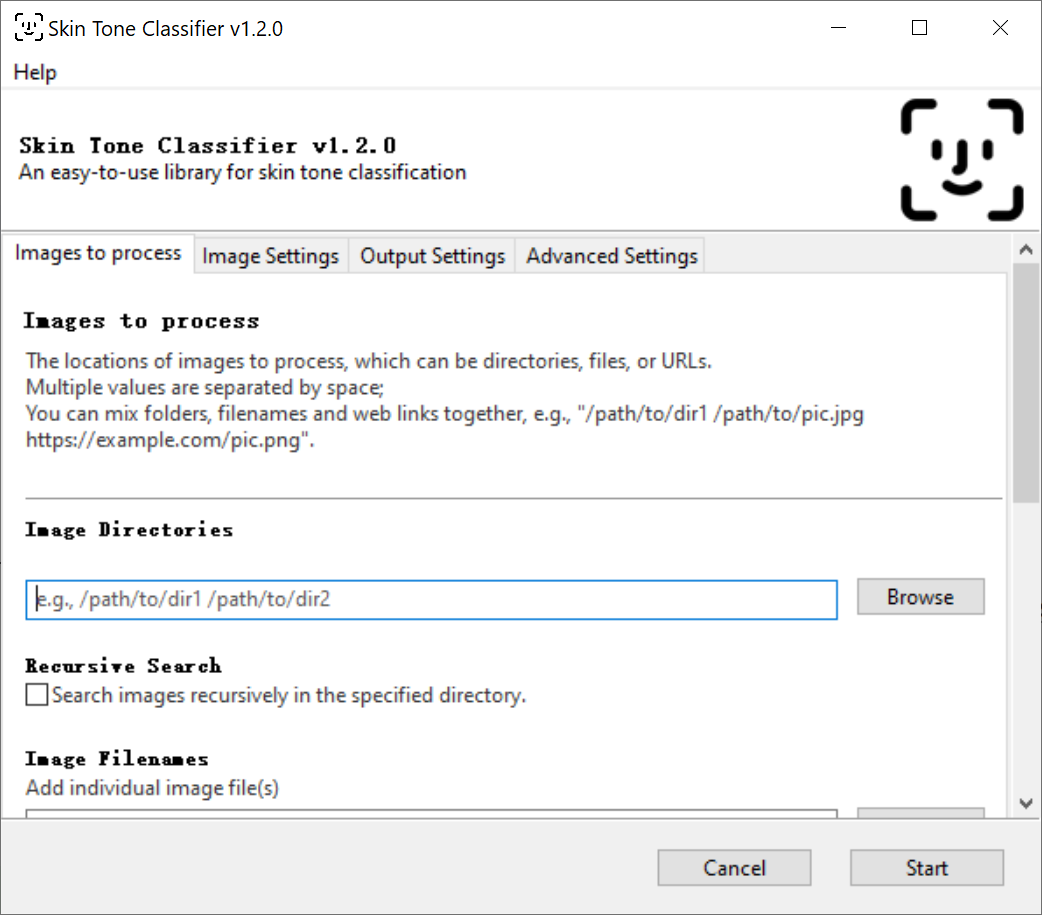
Instead of typing commands in the terminal, you can use the config GUI of `stone` to process the images.
Steps:
1. Open the terminal that can run `stone` (e.g., `PowerShell` in Windows or `Terminal` in macOS).
2. Type `stone` (without any parameters) or `stone --gui` and press <kbd>Enter</kbd> to open the GUI.
3. Specify the parameters in each tab.
4. Click the `Start` button to start processing the images.
Hopefully, this can make it easier for you to use `stone` 🍻!
> [!TIP]
>
> 1. It is recommended to install v1.2.3+, which supports Python 3.9+.
>
> If you have installed v1.2.0, please upgrade to v1.2.3+ by running
>
> `pip install skin-tone-classifier[all] --upgrade`
>
> 2. If you encounter the following problem:
> > This program needs access to the screen. Please run with a Framework
> > build of python, and only when you are logged in on the main display
> > of your Mac.
>
> Please launch the GUI by running `pythonw -m stone` in the terminal.
> References:
> * [stackoverflow](https://stackoverflow.com/a/52732858/8860079)
> * [python-using-mac](https://docs.python.org/3/using/mac.html)
### Use `stone` in command line interface (CLI)
To detect the skin tone in a portrait, e.g.,
<div align="center">
<img src="https://raw.githubusercontent.com/ChenglongMa/SkinToneClassifier/main/docs/demo.png" alt="Demo picture" style="display: block; margin: auto"/>
</div>
Just run:
```shell
stone -i /path/to/demo.png --debug
```
Then, you can find the processed image in `./debug/color/faces_1` folder, e.g.,
<div align="center">
<img src="https://raw.githubusercontent.com/ChenglongMa/SkinToneClassifier/main/docs/demo-1.png" alt="processed demo picture" style="display: block; margin: auto"/>
</div>
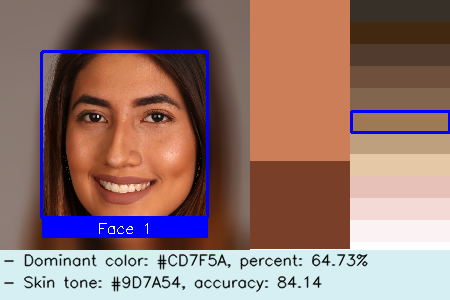
In this image, from left to right you can find the following information:
1. detected face with a label (*Face 1*) enclosed by a rectangle.
2. dominant colors.
1. _The number of colors depends on settings (default is 2), and their sizes depend on their proportion._
3. specified color palette and the target label is enclosed by a rectangle.
4. you can find a summary text at the bottom.
Furthermore, there will be a report file named `result.csv` which contains more detailed information, e.g.,
| file | image type | face id | dominant 1 | percent 1 | dominant 2 | percent 2 | skin tone | tone label | accuracy(0-100) |
|----------|------------|---------|------------|-----------|------------|-----------|-----------|------------|-----------------|
| demo.png | color | 1 | #C99676 | 0.67 | #805341 | 0.33 | #9D7A54 | CF | 86.27 |
### Interpretation of the table
1. `file`: the filename of the processed image.
* **NB: The filename pattern of report image is `<file>-<face id>.<extension>`**
2. `image type`: the type of the processed image, i.e., `color` or `bw` (black/white).
3. `face id`: the id of the detected face, which matches the reported image. `NA` means no face has been detected.
4. `dominant n`: the `n`-th dominant color of the detected face.
5. `percent n`: the percentage of the `n`-th dominant color, (0~1.0).
6. `skin tone`: the skin tone category of the detected face.
7. `tone label`: the **label** of skin tone category of the detected face.
8. `accuracy`: the accuracy of the skin tone category of the detected face, (0~100). The larger, the better.
## Detailed Usage
To see the usage and parameters, run:
```shell
stone -h (or --help)
```
Detailed usage:
| Short Option | Long Option | Definition |
|--------------|---------------|-----------------------------------------------------------------------------------------------------------------------------------------------------------------------------------------------------------------------------------------------------------------------------------------------------------------------------------------------------------------------------------|
| -h | --help | Show this help message and exit. |
| -i | --images | Image filename(s) or URLs to process. <br>Supports multiple values separated by **space**, e.g., `a.jpg b.png`. <br>Supports directory or file name(s), e.g., `./path/to/images/ a.jpg`. <br>Supports URL(s), e.g., `https://example.com/images/pic.jpg` since v1.1.0+. <br>If you don't specify this option, the app will search all images in the current directory by default. |
| -r | --recursive | Whether to search images **recursively** in the specified directory. |
| -t | --image_type | Specify whether the input image(s) is/are **colored** or **black/white**. <br>Valid choices are: `auto`, `color`, or `bw`. <br>Defaults to `auto`, which will be detected **automatically**. |
| -p | --palette | Skin tone palette. <br>Valid choices can be `perla`, `yadon-ostfeld`, `proder`; <br>You can also input RGB **hex** values starting with `#` <br>or **RGB** values separated by **commas**, <br>e.g., `-p #373028 #422811` or `-p 255,255,255 100,100,100`. |
| -l | --labels | Skin tone labels. <br>Default values are the **UPPERCASE** alphabet list leading by the image type <br>(`C` for `color`; `B` for `Black&White`), <br>e.g., `['CA', 'CB', ..., 'CZ']` or `['BA', 'BB', ..., 'BZ']`. |
| -d | --debug | Whether to generate report images, used for debugging and verification. <br>The report images will be saved in the `./debug` directory. |
| -bw | --black_white | Whether to convert the input to **black/white** image(s). <br>If `true`, the app will use a **black/white palette** to classify the image. |
| -o | --output | The path of the output file, defaults to **the current directory**. |
| | --n_workers | The number of workers to process the images, <br>defaults to **the number of CPUs** in the system. |
| | --n_colors | CONFIG: the number of dominant colors to be extracted, defaults to 2. |
| | --new_width | CONFIG: resize the images with the specified width. <br>**Negative value will be ignored**, defaults to 250. |
| | --scale | CONFIG: how much the image size is reduced at each image scale, defaults to 1.1. |
| | --min_nbrs | CONFIG: how many neighbors each candidate rectangle should have to retain it. <br>**Higher value results in fewer detections but with higher quality**, defaults to 5. |
| | --min_size | CONFIG: minimum possible face size. **Faces smaller than that are ignored**. <br>Valid format: `width height`, defaults to `90 90`. |
| | --threshold | CONFIG: what percentage of the skin area is required to identify the face, <br>defaults to 0.15. |
| -v | --version | Show the version number and exit. |
### Use Cases
#### 1. Process multiple images
1.1 Multiple filenames
```shell
stone -i (or --images) a.jpg b.png https://example.com/images/pic.jpg
```
1.2 Images in some folder(s)
```shell
stone -i ./path/to/images/
```
NB: Supported image formats: `.jpg, .gif, .png, .jpeg, .webp, .tif`.
In default (i.e., `stone` without `-i` option), the app will search images in current folder.
#### 2. Specify color palette
2.1 Use the built-in palettes
The built-in palettes are: `perla`, `yadon-ostfeld`, `proder` and `bw`.
NB: The `bw` palette is used to classify the **black/white** images only.
For example:
```shell
stone -p (or --palette) perla
```
The HEX values of each palette are:

* `perla`:
* `#373028`, `#422811`, `#513B2E`, `#6F503C`, `#81654F`, `#9D7A54`, `#BEA07E`, `#E5C8A6`, `#E7C1B8`, `#F3DAD6`, `#FBF2F3`
* Citation: Rejón Piña, R. A., & Ma, C. (2021). Classification Algorithm for Skin Color (CASCo): A new tool to measure skin color in social science research.

* `yadon-ostfeld`:
* `#36251d`, `#48352c`, `#614539`, `#755848`, `#886958`, `#9b7966`, `#b18972`, `#c29c88`, `#d4afa3`, `#e6c6bf`
* Citation: Ostfeld, M. C., & Yadon, N. (2022). Skin color, power, and politics in America. Russell Sage Foundation.

* `proder`:
* `#654d3e`, `#775741`, `#876249`, `#946c51`, `#a0765a`, `#a87f64`, `#b1886c`, `#b69279`, `#be9d86`, `#c5a691`, `#c8ac99`
* Citation: Proyecto sobre discriminación étnico-racial en México (PRODER). El Colegio de México. https://discriminacion.colmex.mx/encuesta-proder/

* `bw`:
* `#FFFFFF`, `#F0F0F0`, `#E0E0E0`, `#D0D0D0`, `#C0C0C0`, `#B0B0B0`, `#A0A0A0`, `#909090`, `#808080`, `#707070`, `#606060`, `#505050`, `#404040`, `#303030`, `#202020`, `#101010`, `#000000`
* Citation: Leigh, A., & Susilo, T. (2009). Is voting skin-deep? Estimating the effect of candidate ballot photographs on election outcomes. Journal of Economic Psychology, 30(1), 61-70.
2.2 Use HEX values
```shell
stone -p #373028 #422811 #513B2E
```
NB: Values start with **'#'** and are separated by **space**.
2.3 Use RGB tuple values
```shell
stone -p 55,48,40 66,40,17 251,242,243
```
NB: Values split by **comma ','**, multiple values are still separated by **space**.
#### 3. Specify category labels
You can assign the labels for the skin tone categories, for example:
```text
"CA": "#373028",
"CB": "#422811",
"CC": "#513B2E",
...
```
To achieve this, you can use the `-l` (or `--labels`) option:
3.1 Specify the labels directly using __spaces__ as delimiters, e.g.,
```shell
stone -l A B C D E F G H
```
3.2 Specify the range of labels based on this pattern: `<start><sep><end><sep><step>`.
Specifically,
* `<start>`: the **start** label, can be a letter (e.g., `A`) or a number (e.g., `1`);
* `<end>`: the **end** label, can be a letter (e.g., `H`) or a number (e.g., `8`);
* `<step>`: the **step** to generate the label sequence, can be a number (e.g., `2` or `-1`), **defaults to `1`**.
* `<sep>`: the **separator** between `<start>` and `<end>`, can be one of these symbols: `-`, `,`, `~`, `:`, `;`, `_`.
Examples:
```shell
stone -l A-H-1
```
which is equivalent to `stone -l A-H` and `stone -l A B C D E F G H`.
```shell
stone -l A-H-2
```
which is equivalent to `stone -l A C E G`.
```shell
stone -l 1-8
```
which is equivalent to `stone -l 1 2 3 4 5 6 7 8`.
```shell
stone -l 1-8-3
```
which is equivalent to `stone -l 1 4 7`.
> [!IMPORTANT]
>
> Please make sure the number of labels is equal to the number of colors in the palette.
#### 4. Specify output folder
The app puts the final report (`result.csv`) in current folder in default.
To change the output folder:
```shell
stone -o (or --output) ./path/to/output/
```
The output folder will be created if it does not exist.
In `result.csv`, each row is showing the color information of each detected face.
If more than one faces are detected, there will be multiple rows for that image.
#### 5. Store report images for debugging
```shell
stone -d (or --debug)
```
This option will store the report image (like the demo portrait above) in
`./path/to/output/debug/<image type>/faces_<n>` folder,
where `<image type>` indicates if the image is `color` or `bw` (black/white);
`<n>` is the number of faces detected in the image.
**By default, to save storage space, the app does not store report images.**
Like in the `result.csv` file, there will be more than one report images if 2 or more faces were detected.
#### 6. Specify the types of the input image(s)
6.1 The input are color images
```shell
stone -t (or --image_type) color
```
6.2 The input are black/white images
```shell
stone -t (or --image_type) bw
```
6.3 **In default**, the app will detect the image type automatically, i.e.,
```shell
stone -t (or --image_type) auto
```
#### 7. Convert the `color` images to `black/white` images
and then do the classification using `bw` palette
```shell
stone -bw (or --black_white)
```
For example:
<div style="display: flex; justify-content: center;align-items:flex-end;">
<div style="text-align: center;flex:1; margin:10px;">
<img src="https://raw.githubusercontent.com/ChenglongMa/SkinToneClassifier/main/docs/demo.png" alt="Demo picture" />
<p>1. Input</p>
</div>
<div style="text-align: center;flex:1; margin:10px;">
<img src="https://raw.githubusercontent.com/ChenglongMa/SkinToneClassifier/main/docs/demo_bw.png" alt="Black/white Demo picture" />
<p>2. Convert to black/white image</p>
</div>
<div style="text-align: center;flex:1; margin:10px;">
<img src="https://raw.githubusercontent.com/ChenglongMa/SkinToneClassifier/main/docs/demo_bw-1.png" alt="Report image" />
<p>3. The final report image</p>
</div>
</div>
NB: we did not do the opposite, i.e., convert `black/white` images to `color` images
because the current AI models cannot accurately "guess" the color of the skin from a `black/white` image.
It can further bias the analysis results.
#### 8. Tune parameters of face detection
The rest parameters of `CONFIG` are used to detect face.
Please refer to https://stackoverflow.com/a/20805153/8860079 for detailed information.
#### 9. Multiprocessing settings
```shell
stone --n_workers <Any Positive Integer>
```
Use `--n_workers` to specify the number of workers to process images in parallel, defaults to the number of CPUs in your
system.
#### 10. Used as a library by importing into other projects
You can refer to [](https://colab.research.google.com/drive/1k-cryEZ9PInJRXWIi17ib66ufYV2Ikwe?usp=sharing) or the following code snippet:
```python
import stone
from json import dumps
# process the image
result = stone.process(image_path, image_type, palette, *other_args, return_report_image=True)
# show the report image
report_images = result.pop("report_images") # obtain and remove the report image from the `result`
face_id = 1
stone.show(report_images[face_id])
# convert the result to json
result_json = dumps(result)
```
`stone.process` is the main function to process the image.
It has the same parameters as the command line version.
It will return a `dict`, which contains the process result and report image(s) (if required,
i.e., `return_report_image=True`).
You can further use `stone.show` to show the report image(s).
And convert the result to `json` format.
The `result_json` will be like:
```json
{
"basename": "demo",
"extension": ".png",
"image_type": "color",
"faces": [
{
"face_id": 1,
"dominant_colors": [
{
"color": "#C99676",
"percent": "0.67"
},
{
"color": "#805341",
"percent": "0.33"
}
],
"skin_tone": "#9D7A54",
"tone_label": "CF",
"accuracy": 86.27
}
]
}
```
#### 11. Used in a FAST API project
`stone` can be used in a FAST API project to classify the skin tone of the uploaded image(s) via `POST` method.
Please refer to the following code snippet:
```python
# Description: This is a simple FastAPI server that receives an image file
# and processes it using the skin-tone-classifier library.
# requirements.txt:
# fastapi
# uvicorn
# skin-tone-classifier
# python-multipart
# Run the server:
# uvicorn main:app --reload
from typing import Literal
import stone
from fastapi import FastAPI, UploadFile, HTTPException
from fastapi.responses import JSONResponse
app = FastAPI()
@app.post("/stone")
async def process_image(
image_file: UploadFile,
image_type: Literal["auto", "color", "bw"] = "auto",
tone_palette: list = None,
tone_labels: list = None,
# other parameters...
):
image_data = await image_file.read()
temp_file_path = "/tmp/temp_image.jpg"
with open(temp_file_path, "wb") as temp_file:
temp_file.write(image_data)
try:
result = stone.process(
temp_file_path,
image_type=image_type,
tone_palette=tone_palette,
tone_labels=tone_labels,
# other parameters...
)
result = JSONResponse(content=result)
except Exception as e:
raise HTTPException(status_code=500, detail=str(e))
return result
```
To run the demo, please follow these steps:
1. Install required packages:
* skin-tone-classifier
* [fastapi](https://fastapi.tiangolo.com/)
* [uvicorn](https://www.uvicorn.org/)
* [python-multipart](https://pypi.org/project/python-multipart/)
2. Run the server:
`uvicorn main:app --reload`
3. You can refine the implementation according to your project requirements.
4. Finally, you can use [Postman](https://www.postman.com/) or other HTTP Clients to test the API.
# Citation
If you are interested in our work, please cite:
```bibtex
@article{https://doi.org/10.1111/ssqu.13242,
author = {Rej\'{o}n Pi\tilde{n}a, Ren\'{e} Alejandro and Ma, Chenglong},
title = {Classification Algorithm for Skin Color (CASCo): A new tool to measure skin color in social science research},
journal = {Social Science Quarterly},
volume = {n/a},
number = {n/a},
pages = {},
keywords = {colorism, measurement, photo elicitation, racism, skin color, spectrometers},
doi = {https://doi.org/10.1111/ssqu.13242},
url = {https://onlinelibrary.wiley.com/doi/abs/10.1111/ssqu.13242},
eprint = {https://onlinelibrary.wiley.com/doi/pdf/10.1111/ssqu.13242},
abstract = {Abstract Objective A growing body of literature reveals that skin color has significant effects on people's income, health, education, and employment. However, the ways in which skin color has been measured in empirical research have been criticized for being inaccurate, if not subjective and biased. Objective Introduce an objective, automatic, accessible and customizable Classification Algorithm for Skin Color (CASCo). Methods We review the methods traditionally used to measure skin color (verbal scales, visual aids or color palettes, photo elicitation, spectrometers and image-based algorithms), noting their shortcomings. We highlight the need for a different tool to measure skin color Results We present CASCo, a (social researcher-friendly) Python library that uses face detection, skin segmentation and k-means clustering algorithms to determine the skin tone category of portraits. Conclusion After assessing the merits and shortcomings of all the methods available, we argue CASCo is well equipped to overcome most challenges and objections posed against its alternatives. While acknowledging its limitations, we contend that CASCo should complement researchers. toolkit in this area.}
}
```
# Contributing
👋 Welcome to **SkinToneClassifier**! We're excited to have your contributions. Here's how you can get involved:
1. 💡 **Discuss New Ideas**: Have a creative idea or suggestion? Start a discussion in
the [Discussions](https://github.com/ChenglongMa/SkinToneClassifier/discussions) tab to share your thoughts and
gather feedback from the community.
2. ❓ **Ask Questions**: Got questions or need clarification on something in the repository? Feel free to open
an [Issue](https://github.com/ChenglongMa/SkinToneClassifier/issues) labeled as a "question" or participate
in [Discussions](https://github.com/ChenglongMa/SkinToneClassifier/discussions).
3. 🐛 **Issue a Bug**: If you've identified a bug or an issue with the code, please open a
new [Issue](https://github.com/ChenglongMa/SkinToneClassifier/issues) with a clear description of the problem, steps
to reproduce it, and your environment details.
4. ✨ **Introduce New Features**: Want to add a new feature or enhancement to the project? Fork the repository, create a
new branch, and submit a [Pull Request](https://github.com/ChenglongMa/SkinToneClassifier/pulls) with your changes.
Make sure to follow our contribution guidelines.
5. 💖 **Funding**: If you'd like to financially support the project, you can do so
by [sponsoring the repository on GitHub](https://github.com/sponsors/ChenglongMa). Your contributions help us
maintain and improve the project.
# Disclaimer
The images used in this project are from [Flickr-Faces-HQ Dataset (FFHQ)](https://github.com/NVlabs/ffhq-dataset),
which is licensed under the [Creative Commons BY-NC-SA 4.0 license](https://github.com/NVlabs/ffhq-dataset/blob/master/LICENSE.txt).
Thank you for considering contributing to **SkinToneClassifier**.
We value your input and look forward to collaborating with you!
Raw data
{
"_id": null,
"home_page": null,
"name": "skin-tone-classifier",
"maintainer": null,
"docs_url": null,
"requires_python": ">=3.9",
"maintainer_email": "Chenglong Ma <chenglong.m@outlook.com>",
"keywords": "skin tone, image recognition, face detection, skin detection, image segmentation",
"author": null,
"author_email": "Chenglong Ma <chenglong.m@outlook.com>",
"download_url": "https://files.pythonhosted.org/packages/d4/b9/2aa24b864836bfd8cffcdf0c370839ceb4f7a1dcdbab1e21cd4b86132ea6/skin_tone_classifier-1.2.5.tar.gz",
"platform": null,
"description": "<head>\r\n <link rel=\"icon\" type=\"image/png\" href=\"https://raw.githubusercontent.com/ChenglongMa/SkinToneClassifier/main/docs/icon.svg\">\r\n</head>\r\n\r\n<div style=\"text-align:center;\">\r\n <img src=\"https://raw.githubusercontent.com/ChenglongMa/SkinToneClassifier/main/docs/stone-logo.png\" alt=\"stone logo\">\r\n <img src=\"https://raw.githubusercontent.com/ChenglongMa/SkinToneClassifier/main/docs/illustration.svg\" alt=\"model illustration\">\r\n</div>\r\n\r\n\r\n[](https://pypi.org/project/skin-tone-classifier/)\r\n[](https://pypi.org/project/skin-tone-classifier/)\r\n[](https://github.com/ChenglongMa/SkinToneClassifier/releases/latest)\r\n[](https://github.com/ChenglongMa/SkinToneClassifier/blob/main/LICENSE)\r\n[](https://youtube.com/playlist?list=PLYRpHlp-9V_E5ZLhW1hbNaVjS5Zg6b6kQ&si=ezxUR7McUbZa4clT)\r\n[](https://colab.research.google.com/drive/1k-cryEZ9PInJRXWIi17ib66ufYV2Ikwe?usp=sharing)\r\n[](https://github.com/ChenglongMa/SkinToneClassifier)\r\n\r\nAn easy-to-use library for skin tone classification.\r\n\r\nThis can be used to detect **face** or **skin area** in the specified images.\r\nThe detected skin tones are then classified into the specified color categories.\r\nThe library finally generates results to report the detected faces (if any),\r\ndominant skin tones and color categories.\r\n\r\nCheck out the [Changelog](https://github.com/ChenglongMa/SkinToneClassifier/blob/main/CHANGELOG.md) for the latest updates.\r\n\r\n*If you find this project helpful, please\r\nconsider [giving it a star](https://github.com/ChenglongMa/SkinToneClassifier)* \u2b50. *It would be a great encouragement\r\nfor me!*\r\n\r\n---\r\n\r\n<!-- START doctoc generated TOC please keep comment here to allow auto update -->\r\n<!-- DON'T EDIT THIS SECTION, INSTEAD RE-RUN doctoc TO UPDATE -->\r\n**Table of Contents**\r\n\r\n- [Showcases](#showcases)\r\n - [PERLA Palette](#perla-palette)\r\n - [YADON-OSTFELD Palette](#yadon-ostfeld-palette)\r\n - [PRODER Palette](#proder-palette)\r\n- [Video tutorials](#video-tutorials)\r\n - [Playlist](#playlist)\r\n - [1. How to install Python and `stone`](#1-how-to-install-python-and-stone)\r\n - [2. Use `stone` in GUI mode](#2-use-stone-in-gui-mode)\r\n - [3. Use `stone` in CLI mode](#3-use-stone-in-cli-mode)\r\n - [4. Use `stone` in Python scripts](#4-use-stone-in-python-scripts)\r\n- [Installation](#installation)\r\n - [Install from pip](#install-from-pip)\r\n - [Install the CLI mode only](#install-the-cli-mode-only)\r\n - [Install the CLI mode and the GUI mode](#install-the-cli-mode-and-the-gui-mode)\r\n - [Install from source](#install-from-source)\r\n- [HOW TO USE](#how-to-use)\r\n - [Quick Start](#quick-start)\r\n - [Use `stone` in a GUI](#use-stone-in-a-gui)\r\n - [Use `stone` in command line interface (CLI)](#use-stone-in-command-line-interface-cli)\r\n - [Interpretation of the table](#interpretation-of-the-table)\r\n - [Detailed Usage](#detailed-usage)\r\n - [Use Cases](#use-cases)\r\n - [1. Process multiple images](#1-process-multiple-images)\r\n - [2. Specify color palette](#2-specify-color-palette)\r\n - [3. Specify category labels](#3-specify-category-labels)\r\n - [4. Specify output folder](#4-specify-output-folder)\r\n - [5. Store report images for debugging](#5-store-report-images-for-debugging)\r\n - [6. Specify the types of the input image(s)](#6-specify-the-types-of-the-input-images)\r\n - [7. Convert the `color` images to `black/white` images](#7-convert-the-color-images-to-blackwhite-images)\r\n - [8. Tune parameters of face detection](#8-tune-parameters-of-face-detection)\r\n - [9. Multiprocessing settings](#9-multiprocessing-settings)\r\n - [10. Used as a library by importing into other projects](#10-used-as-a-library-by-importing-into-other-projects)\r\n - [11. Used in a FAST API project](#11-used-in-a-fast-api-project)\r\n- [Citation](#citation)\r\n- [Contributing](#contributing)\r\n- [Disclaimer](#disclaimer)\r\n\r\n<!-- END doctoc generated TOC please keep comment here to allow auto update -->\r\n\r\n# Showcases\r\n\r\nThe following are some examples of the classification results using different palettes.\r\n\r\n## PERLA Palette\r\n\r\n\r\n\r\n\r\n\r\n## YADON-OSTFELD Palette\r\n\r\n\r\n\r\n\r\n\r\n## PRODER Palette\r\n\r\n\r\n\r\n\r\n\r\n# Video tutorials\r\n\r\n[](https://youtube.com/playlist?list=PLYRpHlp-9V_E5ZLhW1hbNaVjS5Zg6b6kQ&si=ezxUR7McUbZa4clT)\r\n\r\nPlease visit the following video tutorials if you have no programming background or are unfamiliar with how to use Python and this library \ud83d\udc96\r\n\r\n## Playlist\r\n\r\n[](https://youtube.com/playlist?list=PLYRpHlp-9V_E5ZLhW1hbNaVjS5Zg6b6kQ&si=ezxUR7McUbZa4clT)\r\n\r\n<details markdown=\"1\">\r\n <summary><i>Click here to show more.</i></summary>\r\n \r\n## 1. How to install Python and `stone`\r\n\r\n[](https://www.youtube.com/watch?v=vu6whI0qcmU&list=PLYRpHlp-9V_E5ZLhW1hbNaVjS5Zg6b6kQ&index=1)\r\n\r\n[](https://www.youtube.com/watch?v=vu6whI0qcmU&list=PLYRpHlp-9V_E5ZLhW1hbNaVjS5Zg6b6kQ&index=1)\r\n\r\n## 2. Use `stone` in GUI mode\r\n\r\n[](https://www.youtube.com/watch?v=08apMEogZgs&list=PLYRpHlp-9V_E5ZLhW1hbNaVjS5Zg6b6kQ&index=2)\r\n\r\n[](https://www.youtube.com/watch?v=08apMEogZgs&list=PLYRpHlp-9V_E5ZLhW1hbNaVjS5Zg6b6kQ&index=2)\r\n\r\n## 3. Use `stone` in CLI mode\r\n\r\n[](https://www.youtube.com/watch?v=rqJ62DijQaw&list=PLYRpHlp-9V_E5ZLhW1hbNaVjS5Zg6b6kQ&index=3)\r\n\r\n[](https://www.youtube.com/watch?v=rqJ62DijQaw&list=PLYRpHlp-9V_E5ZLhW1hbNaVjS5Zg6b6kQ&index=3)\r\n\r\n## 4. Use `stone` in Python scripts\r\n\r\nPlease refer to this notebook [](https://colab.research.google.com/drive/1k-cryEZ9PInJRXWIi17ib66ufYV2Ikwe?usp=sharing) for more information.\r\n\r\n_More videos are coming soon..._\r\n\r\n</details>\r\n\r\n# Installation\r\n\r\n> [!TIP]\r\n> \r\n> Since v1.2.3, we have made the GUI mode **optional**.\r\n> \r\n\r\n\r\n## Install from pip\r\n\r\n### Install the CLI mode only\r\n\r\n```shell\r\npip install skin-tone-classifier --upgrade\r\n```\r\n\r\nIt is useful for users who want to use this library in non-GUI environments, e.g., servers or [](https://colab.research.google.com/drive/1k-cryEZ9PInJRXWIi17ib66ufYV2Ikwe?usp=sharing).\r\n\r\n### Install the CLI mode and the GUI mode\r\n\r\n```shell\r\npip install skin-tone-classifier[all] --upgrade\r\n```\r\n\r\nIt is useful for users who are not familiar with the command line interface and want to use the GUI mode.\r\n\r\n## Install from source\r\n\r\n```shell\r\ngit clone git@github.com:ChenglongMa/SkinToneClassifier.git\r\ncd SkinToneClassifier\r\npip install -e . --verbose\r\n```\r\n\r\n> [!TIP]\r\n>\r\n> If you encounter the following problem:\r\n> \r\n> [`ImportError: DLL load failed while importing _core: The specified module could not be found`](https://stackoverflow.com/q/52306805/8860079)\r\n> \r\n> Please download and install **Visual C++ Redistributable** at [here](https://learn.microsoft.com/en-us/cpp/windows/latest-supported-vc-redist?view=msvc-170#visual-studio-2015-2017-2019-and-2022).\r\n>\r\n> Then this error will be gone.\r\n\r\n# HOW TO USE\r\n\r\n> [!TIP]\r\n>\r\n> You can combine the following documents, [the video tutorials above](#video-tutorials)\r\n> and the running examples [](https://colab.research.google.com/drive/1k-cryEZ9PInJRXWIi17ib66ufYV2Ikwe?usp=sharing)\r\n> to understand the usage of this library more intuitively.\r\n> \r\n\r\n## Quick Start\r\n\r\n### Use `stone` in a GUI\r\n\r\n\u2728 Since v1.2.0, we have provided a GUI version of `stone` for users who are not familiar with the command line\r\ninterface.\r\n\r\n\r\n\r\nInstead of typing commands in the terminal, you can use the config GUI of `stone` to process the images.\r\n\r\nSteps:\r\n\r\n1. Open the terminal that can run `stone` (e.g., `PowerShell` in Windows or `Terminal` in macOS).\r\n2. Type `stone` (without any parameters) or `stone --gui` and press <kbd>Enter</kbd> to open the GUI.\r\n3. Specify the parameters in each tab.\r\n4. Click the `Start` button to start processing the images.\r\n\r\nHopefully, this can make it easier for you to use `stone` \ud83c\udf7b!\r\n\r\n> [!TIP]\r\n> \r\n> 1. It is recommended to install v1.2.3+, which supports Python 3.9+.\r\n> \r\n> If you have installed v1.2.0, please upgrade to v1.2.3+ by running \r\n> \r\n> `pip install skin-tone-classifier[all] --upgrade`\r\n>\r\n> 2. If you encounter the following problem:\r\n> > This program needs access to the screen. Please run with a Framework\r\n> > build of python, and only when you are logged in on the main display\r\n> > of your Mac.\r\n> \r\n> Please launch the GUI by running `pythonw -m stone` in the terminal.\r\n> References: \r\n> * [stackoverflow](https://stackoverflow.com/a/52732858/8860079)\r\n> * [python-using-mac](https://docs.python.org/3/using/mac.html)\r\n\r\n### Use `stone` in command line interface (CLI)\r\n\r\nTo detect the skin tone in a portrait, e.g.,\r\n\r\n<div align=\"center\">\r\n <img src=\"https://raw.githubusercontent.com/ChenglongMa/SkinToneClassifier/main/docs/demo.png\" alt=\"Demo picture\" style=\"display: block; margin: auto\"/>\r\n</div>\r\n\r\nJust run:\r\n\r\n```shell\r\nstone -i /path/to/demo.png --debug\r\n```\r\n\r\nThen, you can find the processed image in `./debug/color/faces_1` folder, e.g.,\r\n\r\n<div align=\"center\">\r\n <img src=\"https://raw.githubusercontent.com/ChenglongMa/SkinToneClassifier/main/docs/demo-1.png\" alt=\"processed demo picture\" style=\"display: block; margin: auto\"/>\r\n</div>\r\n\r\nIn this image, from left to right you can find the following information:\r\n\r\n1. detected face with a label (*Face 1*) enclosed by a rectangle.\r\n2. dominant colors.\r\n 1. _The number of colors depends on settings (default is 2), and their sizes depend on their proportion._\r\n3. specified color palette and the target label is enclosed by a rectangle.\r\n4. you can find a summary text at the bottom.\r\n\r\nFurthermore, there will be a report file named `result.csv` which contains more detailed information, e.g.,\r\n\r\n| file | image type | face id | dominant 1 | percent 1 | dominant 2 | percent 2 | skin tone | tone label | accuracy(0-100) |\r\n|----------|------------|---------|------------|-----------|------------|-----------|-----------|------------|-----------------|\r\n| demo.png | color | 1 | #C99676 | 0.67 | #805341 | 0.33 | #9D7A54 | CF | 86.27 |\r\n\r\n### Interpretation of the table\r\n\r\n1. `file`: the filename of the processed image.\r\n * **NB: The filename pattern of report image is `<file>-<face id>.<extension>`**\r\n2. `image type`: the type of the processed image, i.e., `color` or `bw` (black/white).\r\n3. `face id`: the id of the detected face, which matches the reported image. `NA` means no face has been detected.\r\n4. `dominant n`: the `n`-th dominant color of the detected face.\r\n5. `percent n`: the percentage of the `n`-th dominant color, (0~1.0).\r\n6. `skin tone`: the skin tone category of the detected face.\r\n7. `tone label`: the **label** of skin tone category of the detected face.\r\n8. `accuracy`: the accuracy of the skin tone category of the detected face, (0~100). The larger, the better.\r\n\r\n## Detailed Usage\r\n\r\nTo see the usage and parameters, run:\r\n\r\n```shell\r\nstone -h (or --help)\r\n```\r\n\r\nDetailed usage:\r\n\r\n| Short Option | Long Option | Definition |\r\n|--------------|---------------|-----------------------------------------------------------------------------------------------------------------------------------------------------------------------------------------------------------------------------------------------------------------------------------------------------------------------------------------------------------------------------------|\r\n| -h | --help | Show this help message and exit. |\r\n| -i | --images | Image filename(s) or URLs to process. <br>Supports multiple values separated by **space**, e.g., `a.jpg b.png`. <br>Supports directory or file name(s), e.g., `./path/to/images/ a.jpg`. <br>Supports URL(s), e.g., `https://example.com/images/pic.jpg` since v1.1.0+. <br>If you don't specify this option, the app will search all images in the current directory by default. |\r\n| -r | --recursive | Whether to search images **recursively** in the specified directory. |\r\n| -t | --image_type | Specify whether the input image(s) is/are **colored** or **black/white**. <br>Valid choices are: `auto`, `color`, or `bw`. <br>Defaults to `auto`, which will be detected **automatically**. |\r\n| -p | --palette | Skin tone palette. <br>Valid choices can be `perla`, `yadon-ostfeld`, `proder`; <br>You can also input RGB **hex** values starting with `#` <br>or **RGB** values separated by **commas**, <br>e.g., `-p #373028 #422811` or `-p 255,255,255 100,100,100`. |\r\n| -l | --labels | Skin tone labels. <br>Default values are the **UPPERCASE** alphabet list leading by the image type <br>(`C` for `color`; `B` for `Black&White`), <br>e.g., `['CA', 'CB', ..., 'CZ']` or `['BA', 'BB', ..., 'BZ']`. |\r\n| -d | --debug | Whether to generate report images, used for debugging and verification. <br>The report images will be saved in the `./debug` directory. |\r\n| -bw | --black_white | Whether to convert the input to **black/white** image(s). <br>If `true`, the app will use a **black/white palette** to classify the image. |\r\n| -o | --output | The path of the output file, defaults to **the current directory**. |\r\n| | --n_workers | The number of workers to process the images, <br>defaults to **the number of CPUs** in the system. |\r\n| | --n_colors | CONFIG: the number of dominant colors to be extracted, defaults to 2. |\r\n| | --new_width | CONFIG: resize the images with the specified width. <br>**Negative value will be ignored**, defaults to 250. |\r\n| | --scale | CONFIG: how much the image size is reduced at each image scale, defaults to 1.1. |\r\n| | --min_nbrs | CONFIG: how many neighbors each candidate rectangle should have to retain it. <br>**Higher value results in fewer detections but with higher quality**, defaults to 5. |\r\n| | --min_size | CONFIG: minimum possible face size. **Faces smaller than that are ignored**. <br>Valid format: `width height`, defaults to `90 90`. |\r\n| | --threshold | CONFIG: what percentage of the skin area is required to identify the face, <br>defaults to 0.15. |\r\n| -v | --version | Show the version number and exit. |\r\n\r\n### Use Cases\r\n\r\n#### 1. Process multiple images\r\n\r\n1.1 Multiple filenames\r\n\r\n```shell\r\nstone -i (or --images) a.jpg b.png https://example.com/images/pic.jpg\r\n```\r\n\r\n1.2 Images in some folder(s)\r\n\r\n```shell\r\nstone -i ./path/to/images/\r\n```\r\n\r\nNB: Supported image formats: `.jpg, .gif, .png, .jpeg, .webp, .tif`.\r\n\r\nIn default (i.e., `stone` without `-i` option), the app will search images in current folder.\r\n\r\n#### 2. Specify color palette\r\n\r\n2.1 Use the built-in palettes\r\n\r\nThe built-in palettes are: `perla`, `yadon-ostfeld`, `proder` and `bw`.\r\n\r\nNB: The `bw` palette is used to classify the **black/white** images only.\r\n\r\nFor example:\r\n```shell\r\nstone -p (or --palette) perla\r\n```\r\n\r\nThe HEX values of each palette are:\r\n\r\n\r\n\r\n* `perla`:\r\n * `#373028`, `#422811`, `#513B2E`, `#6F503C`, `#81654F`, `#9D7A54`, `#BEA07E`, `#E5C8A6`, `#E7C1B8`, `#F3DAD6`, `#FBF2F3`\r\n * Citation: Rej\u00f3n Pi\u00f1a, R. A., & Ma, C. (2021). Classification Algorithm for Skin Color (CASCo): A new tool to measure skin color in social science research.\r\n\r\n\r\n\r\n* `yadon-ostfeld`:\r\n * `#36251d`, `#48352c`, `#614539`, `#755848`, `#886958`, `#9b7966`, `#b18972`, `#c29c88`, `#d4afa3`, `#e6c6bf`\r\n * Citation: Ostfeld, M. C., & Yadon, N. (2022). Skin color, power, and politics in America. Russell Sage Foundation.\r\n\r\n\r\n\r\n* `proder`:\r\n * `#654d3e`, `#775741`, `#876249`, `#946c51`, `#a0765a`, `#a87f64`, `#b1886c`, `#b69279`, `#be9d86`, `#c5a691`, `#c8ac99`\r\n * Citation: Proyecto sobre discriminaci\u00f3n \u00e9tnico-racial en M\u00e9xico (PRODER). El Colegio de M\u00e9xico. https://discriminacion.colmex.mx/encuesta-proder/\r\n\r\n\r\n\r\n* `bw`:\r\n * `#FFFFFF`, `#F0F0F0`, `#E0E0E0`, `#D0D0D0`, `#C0C0C0`, `#B0B0B0`, `#A0A0A0`, `#909090`, `#808080`, `#707070`, `#606060`, `#505050`, `#404040`, `#303030`, `#202020`, `#101010`, `#000000`\r\n * Citation: Leigh, A., & Susilo, T. (2009). Is voting skin-deep? Estimating the effect of candidate ballot photographs on election outcomes. Journal of Economic Psychology, 30(1), 61-70.\r\n\r\n2.2 Use HEX values\r\n\r\n```shell\r\nstone -p #373028 #422811 #513B2E\r\n```\r\n\r\nNB: Values start with **'#'** and are separated by **space**.\r\n\r\n2.3 Use RGB tuple values\r\n\r\n```shell\r\nstone -p 55,48,40 66,40,17 251,242,243\r\n```\r\n\r\nNB: Values split by **comma ','**, multiple values are still separated by **space**.\r\n\r\n#### 3. Specify category labels\r\n\r\nYou can assign the labels for the skin tone categories, for example:\r\n\r\n```text\r\n\"CA\": \"#373028\",\r\n\"CB\": \"#422811\",\r\n\"CC\": \"#513B2E\",\r\n...\r\n```\r\n\r\nTo achieve this, you can use the `-l` (or `--labels`) option:\r\n\r\n3.1 Specify the labels directly using __spaces__ as delimiters, e.g.,\r\n\r\n```shell\r\nstone -l A B C D E F G H\r\n```\r\n\r\n3.2 Specify the range of labels based on this pattern: `<start><sep><end><sep><step>`.\r\n\r\nSpecifically,\r\n\r\n* `<start>`: the **start** label, can be a letter (e.g., `A`) or a number (e.g., `1`);\r\n* `<end>`: the **end** label, can be a letter (e.g., `H`) or a number (e.g., `8`);\r\n* `<step>`: the **step** to generate the label sequence, can be a number (e.g., `2` or `-1`), **defaults to `1`**.\r\n* `<sep>`: the **separator** between `<start>` and `<end>`, can be one of these symbols: `-`, `,`, `~`, `:`, `;`, `_`.\r\n\r\nExamples:\r\n\r\n```shell\r\nstone -l A-H-1\r\n```\r\n\r\nwhich is equivalent to `stone -l A-H` and `stone -l A B C D E F G H`.\r\n\r\n```shell\r\nstone -l A-H-2\r\n```\r\n\r\nwhich is equivalent to `stone -l A C E G`.\r\n\r\n```shell\r\nstone -l 1-8\r\n```\r\n\r\nwhich is equivalent to `stone -l 1 2 3 4 5 6 7 8`.\r\n\r\n```shell\r\nstone -l 1-8-3\r\n```\r\n\r\nwhich is equivalent to `stone -l 1 4 7`.\r\n\r\n\r\n> [!IMPORTANT]\r\n>\r\n> Please make sure the number of labels is equal to the number of colors in the palette.\r\n\r\n#### 4. Specify output folder\r\n\r\nThe app puts the final report (`result.csv`) in current folder in default.\r\n\r\nTo change the output folder:\r\n\r\n```shell\r\nstone -o (or --output) ./path/to/output/\r\n```\r\n\r\nThe output folder will be created if it does not exist.\r\n\r\nIn `result.csv`, each row is showing the color information of each detected face.\r\nIf more than one faces are detected, there will be multiple rows for that image.\r\n\r\n#### 5. Store report images for debugging\r\n\r\n```shell\r\nstone -d (or --debug)\r\n```\r\n\r\nThis option will store the report image (like the demo portrait above) in\r\n`./path/to/output/debug/<image type>/faces_<n>` folder,\r\nwhere `<image type>` indicates if the image is `color` or `bw` (black/white);\r\n`<n>` is the number of faces detected in the image.\r\n\r\n**By default, to save storage space, the app does not store report images.**\r\n\r\nLike in the `result.csv` file, there will be more than one report images if 2 or more faces were detected.\r\n\r\n#### 6. Specify the types of the input image(s)\r\n\r\n6.1 The input are color images\r\n\r\n```shell\r\nstone -t (or --image_type) color\r\n```\r\n\r\n6.2 The input are black/white images\r\n\r\n```shell\r\nstone -t (or --image_type) bw\r\n```\r\n\r\n6.3 **In default**, the app will detect the image type automatically, i.e.,\r\n\r\n```shell\r\nstone -t (or --image_type) auto\r\n```\r\n\r\n#### 7. Convert the `color` images to `black/white` images\r\n\r\nand then do the classification using `bw` palette\r\n\r\n```shell\r\nstone -bw (or --black_white)\r\n```\r\n\r\nFor example:\r\n\r\n<div style=\"display: flex; justify-content: center;align-items:flex-end;\">\r\n <div style=\"text-align: center;flex:1; margin:10px;\">\r\n <img src=\"https://raw.githubusercontent.com/ChenglongMa/SkinToneClassifier/main/docs/demo.png\" alt=\"Demo picture\" />\r\n <p>1. Input</p>\r\n </div>\r\n <div style=\"text-align: center;flex:1; margin:10px;\">\r\n <img src=\"https://raw.githubusercontent.com/ChenglongMa/SkinToneClassifier/main/docs/demo_bw.png\" alt=\"Black/white Demo picture\" />\r\n <p>2. Convert to black/white image</p>\r\n </div>\r\n <div style=\"text-align: center;flex:1; margin:10px;\">\r\n <img src=\"https://raw.githubusercontent.com/ChenglongMa/SkinToneClassifier/main/docs/demo_bw-1.png\" alt=\"Report image\" />\r\n <p>3. The final report image</p>\r\n </div>\r\n</div>\r\n\r\nNB: we did not do the opposite, i.e., convert `black/white` images to `color` images\r\nbecause the current AI models cannot accurately \"guess\" the color of the skin from a `black/white` image.\r\nIt can further bias the analysis results.\r\n\r\n#### 8. Tune parameters of face detection\r\n\r\nThe rest parameters of `CONFIG` are used to detect face.\r\nPlease refer to https://stackoverflow.com/a/20805153/8860079 for detailed information.\r\n\r\n#### 9. Multiprocessing settings\r\n\r\n```shell\r\nstone --n_workers <Any Positive Integer>\r\n```\r\n\r\nUse `--n_workers` to specify the number of workers to process images in parallel, defaults to the number of CPUs in your\r\nsystem.\r\n\r\n#### 10. Used as a library by importing into other projects\r\n\r\nYou can refer to [](https://colab.research.google.com/drive/1k-cryEZ9PInJRXWIi17ib66ufYV2Ikwe?usp=sharing) or the following code snippet:\r\n\r\n```python\r\nimport stone\r\nfrom json import dumps\r\n\r\n# process the image\r\nresult = stone.process(image_path, image_type, palette, *other_args, return_report_image=True)\r\n# show the report image\r\nreport_images = result.pop(\"report_images\") # obtain and remove the report image from the `result`\r\nface_id = 1\r\nstone.show(report_images[face_id])\r\n\r\n# convert the result to json\r\nresult_json = dumps(result)\r\n```\r\n\r\n`stone.process` is the main function to process the image.\r\nIt has the same parameters as the command line version.\r\n\r\nIt will return a `dict`, which contains the process result and report image(s) (if required,\r\ni.e., `return_report_image=True`).\r\n\r\nYou can further use `stone.show` to show the report image(s).\r\nAnd convert the result to `json` format.\r\n\r\nThe `result_json` will be like:\r\n\r\n```json\r\n{\r\n \"basename\": \"demo\",\r\n \"extension\": \".png\",\r\n \"image_type\": \"color\",\r\n \"faces\": [\r\n {\r\n \"face_id\": 1,\r\n \"dominant_colors\": [\r\n {\r\n \"color\": \"#C99676\",\r\n \"percent\": \"0.67\"\r\n },\r\n {\r\n \"color\": \"#805341\",\r\n \"percent\": \"0.33\"\r\n }\r\n ],\r\n \"skin_tone\": \"#9D7A54\",\r\n \"tone_label\": \"CF\",\r\n \"accuracy\": 86.27\r\n }\r\n ]\r\n}\r\n```\r\n\r\n#### 11. Used in a FAST API project\r\n\r\n`stone` can be used in a FAST API project to classify the skin tone of the uploaded image(s) via `POST` method.\r\n\r\nPlease refer to the following code snippet:\r\n\r\n```python\r\n# Description: This is a simple FastAPI server that receives an image file \r\n# and processes it using the skin-tone-classifier library.\r\n\r\n# requirements.txt:\r\n# fastapi\r\n# uvicorn\r\n# skin-tone-classifier\r\n# python-multipart\r\n\r\n# Run the server:\r\n# uvicorn main:app --reload\r\n\r\nfrom typing import Literal\r\n\r\nimport stone\r\nfrom fastapi import FastAPI, UploadFile, HTTPException\r\nfrom fastapi.responses import JSONResponse\r\n\r\napp = FastAPI()\r\n\r\n\r\n@app.post(\"/stone\")\r\nasync def process_image(\r\n image_file: UploadFile,\r\n image_type: Literal[\"auto\", \"color\", \"bw\"] = \"auto\",\r\n tone_palette: list = None,\r\n tone_labels: list = None,\r\n # other parameters...\r\n):\r\n image_data = await image_file.read()\r\n temp_file_path = \"/tmp/temp_image.jpg\"\r\n with open(temp_file_path, \"wb\") as temp_file:\r\n temp_file.write(image_data)\r\n try:\r\n result = stone.process(\r\n temp_file_path,\r\n image_type=image_type,\r\n tone_palette=tone_palette,\r\n tone_labels=tone_labels,\r\n # other parameters...\r\n )\r\n result = JSONResponse(content=result)\r\n except Exception as e:\r\n raise HTTPException(status_code=500, detail=str(e))\r\n return result\r\n```\r\n\r\nTo run the demo, please follow these steps:\r\n\r\n1. Install required packages:\r\n * skin-tone-classifier\r\n * [fastapi](https://fastapi.tiangolo.com/)\r\n * [uvicorn](https://www.uvicorn.org/)\r\n * [python-multipart](https://pypi.org/project/python-multipart/)\r\n2. Run the server:\r\n `uvicorn main:app --reload`\r\n3. You can refine the implementation according to your project requirements. \r\n4. Finally, you can use [Postman](https://www.postman.com/) or other HTTP Clients to test the API.\r\n\r\n# Citation\r\n\r\nIf you are interested in our work, please cite:\r\n\r\n```bibtex\r\n@article{https://doi.org/10.1111/ssqu.13242,\r\n author = {Rej\\'{o}n Pi\\tilde{n}a, Ren\\'{e} Alejandro and Ma, Chenglong},\r\n title = {Classification Algorithm for Skin Color (CASCo): A new tool to measure skin color in social science research},\r\n journal = {Social Science Quarterly},\r\n volume = {n/a},\r\n number = {n/a},\r\n pages = {},\r\n keywords = {colorism, measurement, photo elicitation, racism, skin color, spectrometers},\r\n doi = {https://doi.org/10.1111/ssqu.13242},\r\n url = {https://onlinelibrary.wiley.com/doi/abs/10.1111/ssqu.13242},\r\n eprint = {https://onlinelibrary.wiley.com/doi/pdf/10.1111/ssqu.13242},\r\n abstract = {Abstract Objective A growing body of literature reveals that skin color has significant effects on people's income, health, education, and employment. However, the ways in which skin color has been measured in empirical research have been criticized for being inaccurate, if not subjective and biased. Objective Introduce an objective, automatic, accessible and customizable Classification Algorithm for Skin Color (CASCo). Methods We review the methods traditionally used to measure skin color (verbal scales, visual aids or color palettes, photo elicitation, spectrometers and image-based algorithms), noting their shortcomings. We highlight the need for a different tool to measure skin color Results We present CASCo, a (social researcher-friendly) Python library that uses face detection, skin segmentation and k-means clustering algorithms to determine the skin tone category of portraits. Conclusion After assessing the merits and shortcomings of all the methods available, we argue CASCo is well equipped to overcome most challenges and objections posed against its alternatives. While acknowledging its limitations, we contend that CASCo should complement researchers. toolkit in this area.}\r\n}\r\n```\r\n\r\n# Contributing\r\n\r\n\ud83d\udc4b Welcome to **SkinToneClassifier**! We're excited to have your contributions. Here's how you can get involved:\r\n\r\n1. \ud83d\udca1 **Discuss New Ideas**: Have a creative idea or suggestion? Start a discussion in\r\n the [Discussions](https://github.com/ChenglongMa/SkinToneClassifier/discussions) tab to share your thoughts and\r\n gather feedback from the community.\r\n\r\n2. \u2753 **Ask Questions**: Got questions or need clarification on something in the repository? Feel free to open\r\n an [Issue](https://github.com/ChenglongMa/SkinToneClassifier/issues) labeled as a \"question\" or participate\r\n in [Discussions](https://github.com/ChenglongMa/SkinToneClassifier/discussions).\r\n\r\n3. \ud83d\udc1b **Issue a Bug**: If you've identified a bug or an issue with the code, please open a\r\n new [Issue](https://github.com/ChenglongMa/SkinToneClassifier/issues) with a clear description of the problem, steps\r\n to reproduce it, and your environment details.\r\n\r\n4. \u2728 **Introduce New Features**: Want to add a new feature or enhancement to the project? Fork the repository, create a\r\n new branch, and submit a [Pull Request](https://github.com/ChenglongMa/SkinToneClassifier/pulls) with your changes.\r\n Make sure to follow our contribution guidelines.\r\n\r\n5. \ud83d\udc96 **Funding**: If you'd like to financially support the project, you can do so\r\n by [sponsoring the repository on GitHub](https://github.com/sponsors/ChenglongMa). Your contributions help us\r\n maintain and improve the project.\r\n\r\n# Disclaimer\r\n\r\nThe images used in this project are from [Flickr-Faces-HQ Dataset (FFHQ)](https://github.com/NVlabs/ffhq-dataset), \r\nwhich is licensed under the [Creative Commons BY-NC-SA 4.0 license](https://github.com/NVlabs/ffhq-dataset/blob/master/LICENSE.txt).\r\n\r\nThank you for considering contributing to **SkinToneClassifier**. \r\nWe value your input and look forward to collaborating with you!\r\n",
"bugtrack_url": null,
"license": null,
"summary": "An easy-to-use library for skin tone classification",
"version": "1.2.5",
"project_urls": {
"Bug Reports": "https://github.com/ChenglongMa/SkinToneClassifier/issues",
"Changelog": "https://github.com/ChenglongMa/SkinToneClassifier/blob/main/CHANGELOG.md",
"Funding": "https://github.com/sponsors/ChenglongMa",
"Homepage": "https://chenglongma.com/SkinToneClassifier/",
"Repository": "https://github.com/ChenglongMa/SkinToneClassifier/",
"Say Thanks!": "https://saythanks.io/to/ChenglongMa"
},
"split_keywords": [
"skin tone",
" image recognition",
" face detection",
" skin detection",
" image segmentation"
],
"urls": [
{
"comment_text": "",
"digests": {
"blake2b_256": "b727d9e860f4c8463ada55ef423fdacb5d0ed4dc87d099c31ff7713ef59adee5",
"md5": "3cfd5a52fc9a7afdae72f1a53cd1d76d",
"sha256": "9f1a727f5d9c0a85bf949cbf72c8c94e2957018f15e11203a717d642ffbc60aa"
},
"downloads": -1,
"filename": "skin_tone_classifier-1.2.5-py3-none-any.whl",
"has_sig": false,
"md5_digest": "3cfd5a52fc9a7afdae72f1a53cd1d76d",
"packagetype": "bdist_wheel",
"python_version": "py3",
"requires_python": ">=3.9",
"size": 118379,
"upload_time": "2025-01-17T05:08:33",
"upload_time_iso_8601": "2025-01-17T05:08:33.324928Z",
"url": "https://files.pythonhosted.org/packages/b7/27/d9e860f4c8463ada55ef423fdacb5d0ed4dc87d099c31ff7713ef59adee5/skin_tone_classifier-1.2.5-py3-none-any.whl",
"yanked": false,
"yanked_reason": null
},
{
"comment_text": "",
"digests": {
"blake2b_256": "d4b92aa24b864836bfd8cffcdf0c370839ceb4f7a1dcdbab1e21cd4b86132ea6",
"md5": "c69c6d3490e516e6a7fe23b995c59641",
"sha256": "1ce46baa9ab08c9dfe81b1635b66c42ebb19b47d3c15c1983083a73e3651e526"
},
"downloads": -1,
"filename": "skin_tone_classifier-1.2.5.tar.gz",
"has_sig": false,
"md5_digest": "c69c6d3490e516e6a7fe23b995c59641",
"packagetype": "sdist",
"python_version": "source",
"requires_python": ">=3.9",
"size": 139472,
"upload_time": "2025-01-17T05:08:36",
"upload_time_iso_8601": "2025-01-17T05:08:36.120827Z",
"url": "https://files.pythonhosted.org/packages/d4/b9/2aa24b864836bfd8cffcdf0c370839ceb4f7a1dcdbab1e21cd4b86132ea6/skin_tone_classifier-1.2.5.tar.gz",
"yanked": false,
"yanked_reason": null
}
],
"upload_time": "2025-01-17 05:08:36",
"github": true,
"gitlab": false,
"bitbucket": false,
"codeberg": false,
"github_user": "ChenglongMa",
"github_project": "SkinToneClassifier",
"travis_ci": false,
"coveralls": false,
"github_actions": true,
"requirements": [
{
"name": "opencv-python",
"specs": [
[
"~=",
"4.10.0.84"
]
]
},
{
"name": "numpy",
"specs": [
[
"~=",
"2.2.1"
]
]
},
{
"name": "colormath",
"specs": [
[
"~=",
"3.0.0"
]
]
},
{
"name": "tqdm",
"specs": [
[
"~=",
"4.67.1"
]
]
},
{
"name": "setuptools",
"specs": [
[
">=",
"65.6.3"
]
]
},
{
"name": "colorama",
"specs": [
[
">=",
"0.4.6"
]
]
},
{
"name": "packaging",
"specs": [
[
"~=",
"24.2"
]
]
},
{
"name": "requests",
"specs": [
[
"~=",
"2.32.3"
]
]
},
{
"name": "gooey",
"specs": [
[
"~=",
"1.0.8.1"
]
]
},
{
"name": "colored",
"specs": [
[
"==",
"1.4.4"
]
]
},
{
"name": "re-wx",
"specs": [
[
"==",
"0.0.10"
]
]
}
],
"tox": true,
"lcname": "skin-tone-classifier"
}

